Start Glowing: Your Simple Gua Sha Ritual
Gua sha boosts circulation, drains puffiness, and firms skin; studies show 10 minutes can increase blood flow. In six easy steps you’ll lift, de-puff, and glow with gentle consistency; no experience required, just a clean face and a tool today.
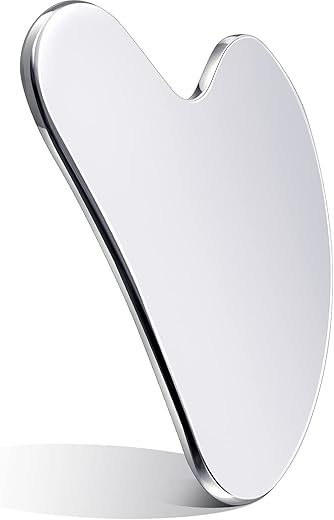
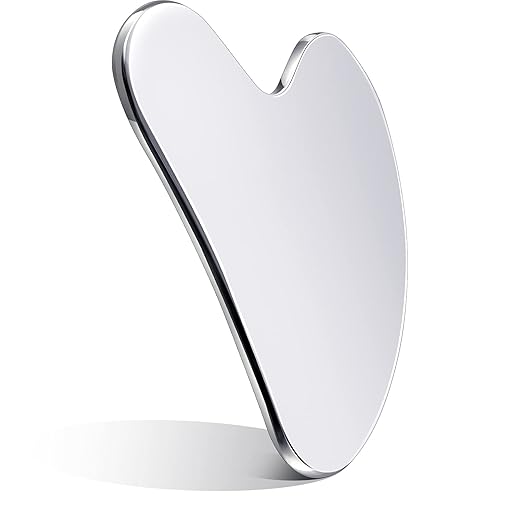
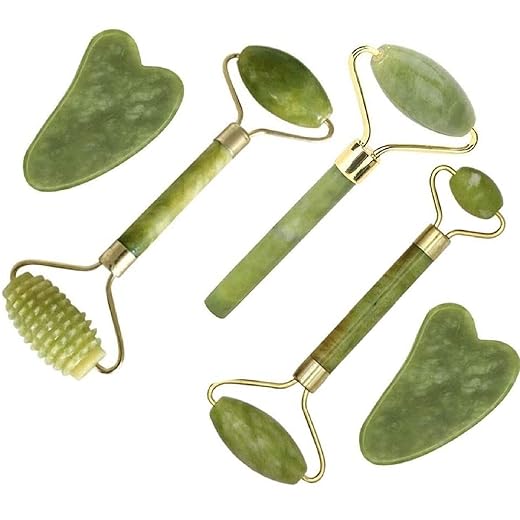
What You'll Need
Simple Gua Sha Tutorial for Instant Glow
Prep the Canvas: Cleanse and Hydrate
Why skipping this step ruins everything — and how 60 seconds can change your skin.Start with a freshly cleansed, slightly damp face so oil and products spread evenly. Wash with your usual cleanser or rinse after a warm shower to open pores.
Apply a few drops of facial oil or a glide-friendly serum to your palms and press into the face. Warm the product between your hands first and then gently press—this helps the oil absorb and calms the skin.
Recommended glide options:
Spend about a minute evenly distributing product and gently warming your face with your hands to increase comfort. Adequate slip prevents dragging and irritation; hydration primes skin for circulation and lymphatic movement.

Anchor Your Tool: Hold Gua Sha Correctly
Grip matters: gentle tilt, 15-degree angle — not a scraping contest!Grip the gua sha between your thumb and index finger so the curved edge sits comfortably along your fingers.
Tilt the stone about 15°—almost flat—so it glides, not digs; imagine the blade kissing the skin rather than pressing into it.
Apply light to medium pressure — enough to move underlying tissue and stimulate lymph flow but never to cause pain.
Warm the stone in your hands for comfort and to improve glide.
Work on one side of the face at a time so you can compare symmetry; finish that side before switching.
Practice a few passes on the back of your hand to feel the correct pressure and angle (you should feel movement, not redness or sharp discomfort).
Quick tips:

Jawline to Ear: Sculpt and Drain
Banish puffiness and a double chin? Yes, with five soothing sweeps.Start at the center of the chin and glide the long edge of the gua sha along the jaw toward the ear.
Use upward, outward strokes with steady pressure—think of lifting the cheek away from the neck.
Apply each stroke 5–8 times, keeping the stone nearly flat so it skims the skin without digging.
Focus on the angle of the jaw and target the masseter muscle; use gentle rocking motions (small back-and-forth tilts) to ease clenching and soften tightness.
Finish by sweeping from the earlobe down the neck toward the collarbone to encourage lymphatic drainage.
Repeat the entire sequence on the other side for even sculpting.
Cheeks and Cheekbones: Lift and Define
Think V-shaped cheeks without the filter — sculpt like a pro.Use the broad curve of the stone to sculpt. Start beside the nose and sweep outward along the cheek toward the ear, following the cheekbone to emphasize lift. Alternate broad sweeps with short upward flicks—think of painting an upward contour. For a quick example, do three steady sweeps, then three small flicks while you breathe slowly.
Using the broad curve, begin beside the nose and sweep outward along the cheek toward the ear, following the bone to emphasize lift. Alternate broad sweeps with short upward flicks across the cheek to stimulate circulation and tighten the appearance. For extra definition, angle the stone under the cheekbone and pull upward toward the temple. Keep movements deliberate and paired—three to six passes per zone—so skin warms evenly and you avoid overworking a single spot.
Under-Eye Area: Gentle Detox for Bright Eyes
Handle with care — this is delicate, but it can reduce dark circles.Use the smaller curved edge or corner for the under-eye area. Lightly glide from the inner corner of the eye outward to the temple with featherlight pressure—never pull the skin. Make tiny, repeated strokes (6–10) to drain accumulated fluid toward the lymph nodes. For example, rest the corner at the inner tear duct and perform eight short, gentle sweeps to the outer corner while breathing slowly.
Finish by sweeping from the temple down the side of the neck to complete drainage.
Forehead and Finish: Smooth, Calm, Seal
Calming finish that keeps product where it belongs — and adds glow.Work the forehead from the center hairline outward, then glide up from the brow toward the hairline with gentle, upward strokes. Use steady, light pressure—imagine erasing pencil marks to smooth fine lines.
Use the flat side to gently smooth horizontal lines across the brow, and use the rounded corner to ease the tension between the brows with small, soothing presses (think of rolling out a small knot).
Finish with light tapping motions across the temples, cheeks and forehead to boost circulation, then sweep down the front of the neck to the collarbones to encourage full lymphatic drainage.
Your Daily Gua Sha Wrap-Up
Consistent, gentle gua sha supports circulation, de-puffing, and a more lifted appearance; stick to the six steps, listen to your skin, and enjoy mindful minutes that deliver visible benefits—try it daily, share your results, and inspire others to glow bright.

Hey, I’m Ava Wilson—a skincare enthusiast and a certified esthetician. I’m dedicated to sharing my knowledge and empowering others to achieve healthy, glowing skin through simple, effective routines and natural remedies. Join me on this exciting skincare journey, and let’s unlock your skin’s potential for a confident, beautiful you.


Looooove the step-by-step breakdown. I usually rush through skincare but this guide made me actually slow down and enjoy it.
The ‘Anchor Your Tool’ section was super helpful — I always held mine at the wrong angle before and it felt awkward. Now I do the 15–30 second forehead sweep while sipping tea and it’s my small daily ritual 😌
Also, the Finish section reminding to seal with moisturizer = clutch.
That’s exactly the vibe we wanted — quick ritual, not a chore. Glad the anchor tip helped! The tea + gua sha combo sounds ideal.
So you’re telling me 6 easy steps will fix 10 years of neglect? Bold claim, but honestly I felt less puffy after two days. My wife called me ‘refreshed’ which is suspiciously suspicious 😂
Ha! Same here — it’s more about temporary lymphatic drainage and relaxation than miracle restructuring. But I’ll take the refreshed look.
Haha — not a time machine, but consistent practice helps with puffiness and circulation. And compliments are a nice bonus!
Under-eye step is my fav. Kept it super gentle and actually saw less dark circles for a bit. Worth trying!
Appreciate the practical steps, but curious about the science. Are there any studies that show long-term benefits for facial structure or is this mostly temporary lymphatic drainage and skin plumping?
Thanks — that matches what I felt. Less puff, more glow, but no face-lift miracle.
Good question — most evidence points to short-term benefits: improved circulation, temporary contouring from fluid movement, and relaxed muscles. Some small studies and anecdotal reports suggest collagen stimulation with consistent practice, but it’s not a dramatic structural change. Definitely more about maintenance and glow than rewiring bone.
Tried the cheekbone lift and felt a weird tightness afterward — not soreness, just kind of ‘pulled’. Is that normal or was I doing it wrong?
If it’s just a mild tightened feeling, it can be from increased circulation and lymph movement — usually okay and temporary. If it’s painful or lasts, stop and check your pressure/angle.
I had that once when I pressed too hard. Lightened up and it went away after a couple minutes.
I liked the forehead and finish sequence — smoothing from center out felt meditative.
Longer note: I have a habit of frowning and carrying tension in my forehead, so the guided calm strokes helped reduce that tiny headache I get by evening. Did the massage nightly for a week and noticed less tightness.
Will keep this as part of my bedtime routine.
Sweet tip about using it for tension — might try before bed too.
Same! Also roll the tool over temples gently — instant relaxation.
That’s lovely to hear, Isabella. Gua sha can definitely help with muscle tension when done with mindful breath. Thanks for sharing your experience.
Quick form check: when doing the jawline-to-ear strokes, do you pull across the skin or push? I feel like I might be tugging too hard and stretching.
Also wondering if it’s okay to use on acne-prone skin or should I avoid active breakouts?
Good eye — always glide, don’t pull. Keep the tool flat against skin and use gentle pressure, especially near jawline. For active acne, avoid directly on inflamed spots; work around them. If it’s cystic, skip that area until it calms.
I had hormonal breakouts and just did light passes around the area. No issues, but I wasn’t aggressive.
Push-ish? I think of it like sweeping lymph — gentle outward strokes. Definitely don’t drag.
Adding: if you’re on retinoids or exfoliating acids, be extra gentle — skin can be thinner and more prone to irritation.
This wrap-up section convinced me to be consistent. The idea of a 3–5 minute finish every night is realistic — not the 30-min spa ritual I never do. Loved the reminder to seal the routine with moisturizer.
Also, fun experiment: tried one cheek for a week and could kinda tell a difference vs the other side. Tiny but real!
Will do — will post results in a week or two. Fingers crossed 🤞
Report back! I’m curious if others notice the same.
I’ll try the one-side test. Very science-y 😂
That mini experiment is an awesome way to test results — subtle changes can add up. Glad the wrap-up made it approachable!
Okay long post incoming because I nerd out over technique:
1) Hold the tool at ~15° for sculpting, flatter for drainage.
2) Use slow, deliberate strokes, 5–7 passes per area.
3) For the under-eye, barely any pressure — the bone is thin!
4) Finish with tapping serum in and a light flossing motion along the jaw.
Also pro tip: keep the tool in the fridge for a cooling depuff. Works wonders. 😎
Fridge idea = AMAZING, especially after a late night.
Adding: avoid freezing the tool to the point of ice — just cool is enough and safer for the skin.
Thanks for the 5–7 passes guideline. I never knew how many was ideal.
Love the detailed breakdown — super helpful for people who want a precise method. The fridge trick is a crowd favorite!
15° tip saved me. I was using a steeper angle and it didn’t feel right.
Tried this last night — OMG my cheekbones actually looked more… awake? 😊
Question: what oil do you all like to use under the tool? I used jojoba but it soaked in too fast. Also, that jawline-to-ear stroke is a game changer.
Olive oil at night for me — messy but cheap lol 😅
So glad it worked for you, Emily! Jojoba can absorb quickly — try squalane or a few drops of facial oil mixed with a thicker serum so the glide lasts. Coconut can be heavy for some skin types.
I mix a couple drops of rosehip with a lightweight lotion. Gives enough slip but not slick.
How often should I do this? Daily? Every other day?
Daily is fine if your skin tolerates it — many do a short 3–5 minute session each day. If you’re new, start every other day and see how your skin responds.
Love the guide! Did it this am b4 work and felt instantly less puffy. Also — typo on step 2 maybe? It says ‘anchor your tool’ then later ‘angle at 45*’ which confused me a bit. But overall great 🙂
This looks neat but I’m worried about bruising. Anyone bruise after trying the under-eye drainage step? I have sensitive skin.
Great question — if you have sensitive skin, use super light pressure and a cool tool. Glide only, and don’t linger. If you see purple/red marks, stop and reduce pressure. Always test on a small area first.
I used to bruise easily until I switched to using a jade roller first and then very gentle gua sha. Much better now.