
Why a Strong Base Matters
I know how frustrating it is when makeup fades or slides. This guide shows six steps to build a smooth, long-lasting base—cleanse, hydrate, prime, apply foundation and concealer wisely, set, and maintain—so your look holds up through busy, sweaty days.
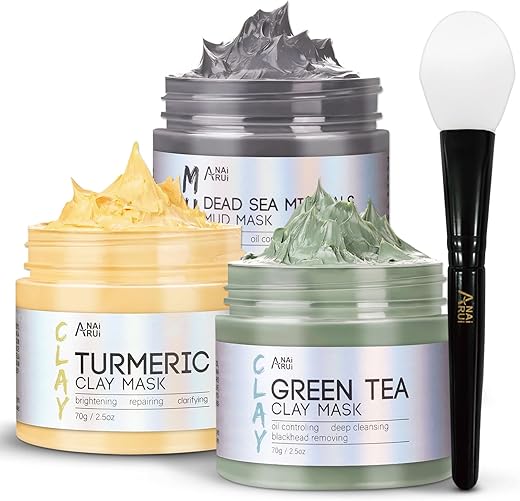
What You’ll Need

Master Base Makeup That Stays All Day: Timeless Glow Tutorial
Step 1: Deep Clean — Start with a Fresh Canvas
Think clean skin equals longer wear — remove everything that fights your foundation.Begin with a thorough cleanse and gentle exfoliation to remove oil, dirt, and dead skin that can break down makeup. Use a mild cleanser matched to your skin type; double-cleanse after heavy SPF or makeup.
Exfoliate two to three times weekly—choose a chemical exfoliant (salicylic acid for oily/combination; lactic or enzyme-based for dry or sensitive) or a gentle physical scrub if your skin tolerates it. Pat skin dry—do not rub—and apply a lightweight hydrating toner or essence if desired.
This first step creates a smooth surface so foundation glides on evenly and adheres better, reducing patchiness, texture cling, and early fading during the day. Double-cleanse when needed, and for very dry skin gently press a light oil into skin first.
Step 2: Hydrate & Prime — The Dual Power Move
Hydrate first, prime second — simple trick: one minute now saves touch-ups later. Want proof?Apply a lightweight, non-greasy moisturizer and give it a minute to sink in; overly wet skin causes foundation to slip, while dried-out skin soaks it up. For example, pat a gel moisturizer into oily zones and a richer cream on dry cheeks.
Use a pea-sized amount, warm the primer between your fingers, and press into skin rather than dragging. Focus on trouble spots (T-zone, around nostrils) and allow 30–60 seconds bonding time before foundation. If using SPF, pick a primer compatible with sunscreen and apply sparingly on a shiny T-zone while keeping cheeks hydrated for a skin-like finish.

Step 3: Flawless Foundation Application — Less Is More
Build coverage like an architect — thin layers beat a single slab of product. Curious why?Pick a foundation formula that matches your skin type and coverage goals. Test shades on the jawline in natural light — the right match disappears.
Start with a small amount. Dot foundation across forehead, cheeks, nose, and chin. Blend outward with a damp sponge for a sheer, skin-like finish or a dense brush for fuller coverage. Use pressing and stippling motions rather than rubbing to preserve skin texture. Build coverage gradually in thin layers, focusing on problem zones and blending down the neck for a seamless transition. Allow each thin layer to set briefly before adding more. For extra longevity, mix a drop of liquid primer into foundation before application.
Step 4: Conceal Smart, Not Heavy
Spot treat, don’t blanket coat — heavy concealer ages you faster than sun damage. Seriously.Target discoloration precisely to avoid a cakey finish. Use color correctors sparingly:
Apply a creamy concealer one shade lighter than foundation in a small triangle under the eyes to brighten. Dab a shade-matched concealer directly onto spots and blemishes. Pat and blend with your fingertip or a small damp sponge, building coverage slowly. Smooth edges into surrounding foundation so transitions disappear. Avoid loading product; less blended well beats more layered poorly. Finish with a very light dusting of finely milled setting powder only where creasing occurs. Touch up midday sparingly.
Step 5: Set Strategically — Lock It In
Setting everything dulls the skin; set only where needed and spray to fuse. Shocking but true.Press, don’t powder everywhere. Use translucent or finely milled setting powder sparingly where oil and creasing habitually appear — typically the T-zone and under-eye.
Use:
Press powder in with a damp sponge for localized control rather than sweeping brushes across the face. Bake only problem areas briefly with a generous dusting, then dust off excess. Choose a long-wear setting spray with a fine mist to dissolve powder particles and meld layers for a skin-like finish; pick matte or dewy based on your desired finish. Spray from arm’s length in an X and T pattern and allow to dry naturally. Carry blotting papers for midday oil control and refresh with a light spritz of setting spray to reactivate makeup without adding product buildup.

Step 6: Midday Maintenance & Habits for Lasting Results
Small habits beat expensive formulas — try these mini rituals that keep makeup intact all day.Resist rubbing your face; use blotting papers to lift oil and reapply a tiny amount of powder only where needed. Carry a few sheets in your bag for quick touch-ups.
Press a lightweight translucent powder with a damp sponge to control shine without patchiness, then mist a setting spray to meld layers and remove any powdery look.
Remove makeup thoroughly at night, moisturize, and treat skin concerns. Prioritize consistent sleep, hydrate, and exfoliate occasionally to extend your base’s life and appearance every day.
Finish Strong
Follow these six steps to build a smooth, long-lasting makeup base that endures heat, humidity, and long days; tailor products to your skin, practice, and you’ll need minimal touch-ups—try it, share your results, and tag us to inspire others today.

Hey, I’m Ava Wilson—a skincare enthusiast and a certified esthetician. I’m dedicated to sharing my knowledge and empowering others to achieve healthy, glowing skin through simple, effective routines and natural remedies. Join me on this exciting skincare journey, and let’s unlock your skin’s potential for a confident, beautiful you.


I appreciated the “conceal smart, not heavy” section. I used to cake concealer under eyes and it always looked so dry by noon. Switching to a thin layer of color corrector + light concealer has helped.
Would love a follow-up on products for mature skin — my fine lines are… not shy. 😂
Totally — for mature skin, look for creamy, hydrating concealers and avoid heavy powders under the eye. You can also try a tiny dab of hydrating primer under the eye area before concealer to smooth fine lines.
Nice guide. Pretty straightforward. I still think SPF under foundation is messy but necessary. No replies
This guide made me think twice before using a paint-roller foundation 😂 Less is more indeed.
Haha, paint-roller foundations are rarely flattering! A little product goes a long way.
I disagree with ‘less is more’ sometimes. For stage or events, heavy coverage still wins. But sure, for daily wear —valid points.
No replies
This guide is super helpful and practical. I wrote down the steps and even made a little checklist for my travel bag:
– Cleanse (double if makeup night)
– Hydrate + primer (light moisturizer + hybrid primer)
– Thin foundation, build only where needed
– Conceal spot treatment, not full under-eye cake
– Set T-zone, mist when done
– Midday: blot, light powder, quick spritz
Been rocking it for a week and my makeup actually looks like skin now, not a mask. Also, reminder: breathe and take your time with blending! ❤️
Anyone else using travel-size versions of products to keep this routine consistent on trips?
I do travel minis! Also empty the usual mascara tube by half to make it TSA friendly (jk but not really 😂).
Love your checklist, Ava — very practical. Travel-size products are a must. Many brands now offer refillable minis that save space and reduce leaks.
Great checklist. I bring a small brush + powder in a compact for touchups.
If anyone has oily-prone skin tips, please share. I follow the steps but my T-zone melts by lunch. Tried mattifying primer, oil-control moisturizer, and even oil-control sunscreen. Still shiny.
What are the best midday habits apart from blotting?
I switched to a powder foundation for the T-zone — helped a lot.
For oily skin, focus on oil-absorbing primers on the T-zone, and use a lightweight matte foundation. For midday, besides blotting, lightly press a small amount of opaque translucent powder with a puff — not too much. Also consider a long-wear setting spray formulated for oil control.
Cold water splash mid-day? Sounds weird but helps a little.
Try a mattifying powder with silica — it absorbs oil without looking cakey.
Short: finish strong = life motto. This helped my weekend makeup stay put for brunch and an afternoon walk.
No replies
Loved the step about concealer. Kept it short and clear — thanks! 😘
Tiny tip: warm concealer between fingers before applying for a less cakey finish.
Glad it resonated, Mia! Let us know if you try the thin layer + color corrector trick.
Love the focus on skin prep — Deep Clean is everything. I started double-cleansing a month ago and my foundation actually sits better now. Also the hydrate + prime tip is a game changer, I mix a tiny drop of facial oil into my moisturizer before priming.
Quick Q: anyone else a fan of silicone vs hydrating primers? Which one helps lock makeup for a long shift?
I prefer hydrating ones — silicone can feel heavy on my skin. But for photos I’ll use a silicone primer under my powder.
I’m glad that’s working for you, Emma! For long shifts, silicone primers often help smooth texture and hold foundation longer, while hydrating primers are better if you need glow and your skin is dry. Sometimes a lightweight hybrid formula is best.
Short and sweet: the ‘Hydrate & Prime’ combo made my foundation last longer and my skin looked less flakey. Thanks!
Also, the guide reminded me to patch test new primers — saved me from a breakout this week.
So glad it helped! Patch testing is underrated. Any other products you switched out after testing?
YES patch testing is a lifesaver. I avoid weird breakouts now.
Great breakdown, but curious about ordering: do you prime after moisturizer and before SPF or the other way around? Some sources say SPF goes on first, others say primer first. Confused on how to layer these without messing up coverage.
Also, would love recs for very light, non-greasy hydrators that don’t pill under primer.
Good question. Generally: cleanse → moisturizer → SPF → primer → foundation. SPF needs to be on top of moisturizer to offer protection. Wait a minute for each layer to absorb. For very light hydrators, look for gel-creams or water-based lotions that sink in quickly; avoid heavy silicones before a silicone primer to prevent pilling.
I apply a thin SPF, let it set for 60 seconds, then primer. Might be overkill but works for me.
Try a lightweight hyaluronic serum under moisturizer if you want extra hydration without greasiness.
Okay, this guide actually made me rethink my whole morning routine. I used to slap on foundation and go, but the “less is more” foundation advice + spot concealing? Genius.
I’ve got combo-oily skin so midday maintenance is my weak spot. Packing blotting papers and a lightweight setting spray has helped, but curious if anyone has tips for avoiding creasing around the nose?
Also, tiny confession: I forget to set my brows sometimes and then my whole face looks unfinished 😅
For creasing around the nose, try using a thin layer of a mattifying primer only in that area before foundation. Also press (don’t rub) your concealer into the skin and lightly set with a thin dusting of translucent powder — focusing on smile lines usually helps too.
Blotting papers are the MVP. Also reapply a tiny bit of powder with a brush (not sponge) midday and you’re golden.
I pat a small amount of powder into the nose crease with a damp sponge. Keeps things from moving without looking cakey.
Very thorough guide — I especially liked the “set strategically” and “midday maintenance” parts. I’ve combined a few tips into my routine:
1) After hydrating, press in a silicone primer where I have texture.n2) Use a thin layer of medium coverage foundation, build only on blemishes.n3) Concealer for dark circles only in an inverted triangle, then set lightly.n4) Powder only on T-zone + under eyes very lightly.n5) Setting spray to meld everything.
Been getting compliments on ‘natural skin’ finish and my makeup lasting through rehearsals. Also: sometimes I do a tiny bit of cream contour before powder for depth that still looks natural. Worth trying!
Thanks for the practical steps — made my mornings less stressful.
Totally stealing your inverted triangle trick.
Agree — cream contour before powder gives such a natural look.
This is the kind of routine I can follow. Clear and simple.
Fantastic routine breakdown, Isabella — love the inverted triangle tip for under-eye concealer. Cream contour before powder is a pro move.
Do you set the cream contour? Or powder over it lightly?
Good guide overall. A couple of questions:
1) When you say “set strategically” — are we talking full face powder or just targeted areas?
2) For people who hate powder, is setting spray alone viable?
I get paranoid about flashback and texture, so I’d rather do less if possible.
Great questions. “Set strategically” usually means target the T-zone, under-eye, and areas that crease. Full-face powder can work but a light dusting is usually enough.
Setting spray alone can work if you have good primers and a long-wear foundation and want a more dewy finish. Just be mindful of humidity and skin type.
I skip powder on cheeks and use spray + a little powder on forehead/nose. Works for me!
If you’re worried about flashback, avoid SPF heavy powders or flash-phobic formulas. Test with a phone flash pic.
For texture, try buffing powder in with a dense brush rather than patting — less cakey.
This was fun to read! Loved the step names (Deep Clean, Finish Strong — sounds like a workout plan for your face lol).
Pro tips from me: use a damp beauty sponge for foundation to avoid cakey spots, and don’t forget the jawline and neck blending or else you get the infamous mask line 🤦♀️.
Also, anyone else who ever forgets to set their chin? That’s my one spot that always gets shiny midday. 😂
If you mix a powder with a little bit of setting spray and press it into the chin, it stays matte but not cakey.
Mask line is real. I started doing my neck first to make sure blending is even — odd but works.
I just use oil-blotting sheets and call it a day 😂
Same here re: chin. Also a little translucent powder under the nose helps reduce shine without looking heavy.
Haha, face workout plan! Blending the jawline is so underrated. For the chin, a dusting of setting powder or a tiny spritz of setting spray helps — or both if it’s a long day.