In this step-by-step guide, you will learn how to create your own cuticle oil pen. Cuticle oil is essential for keeping your cuticles healthy and preventing dryness and hangnails. By following these simple steps, you can make your own cuticle oil pen and have it readily available whenever your nails need some extra care.
Nourish and protect your cuticles
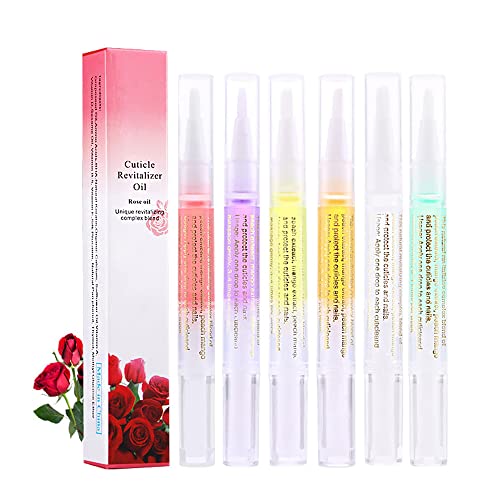


Gather the materials
To gather all the necessary materials for making a cuticle oil pen, start by finding an empty pen that can be easily disassembled. Next, locate a bottle of cuticle oil, preferably one with a dropper cap for easier transfer. Additionally, get a small funnel to help pour the oil into the pen without any spills. Lastly, grab a toothpick, which will be used to push out any excess oil or air bubbles from the pen. For example, you can repurpose a clear ballpoint pen, such as a Bic or a Pilot, by removing the ink cartridge and thoroughly cleaning it before use.


Prepare the pen
Remove the ink cartridge from the pen and rinse out any remaining ink. Ensure that all traces of ink are washed away. Clean the pen thoroughly by gently scrubbing with a mild soap and warm water. Once clean, dry the pen completely before using it again.
Fill the pen
Using the small funnel, place it carefully into the opening of the empty pen. Hold the cuticle oil bottle steady and pour the oil into the funnel, allowing it to flow into the pen. Make sure to fill the pen up to about three-quarters of the way full, leaving some space at the top for air. This will ensure that the pen is not overfilled and that it functions properly.

Remove air bubbles
- Insert a toothpick into the pen: Take a toothpick and carefully insert it into the oil pen’s opening. Make sure the toothpick is long enough to reach the bottom of the pen.
- Gently move it around: Once the toothpick is inserted, start moving it around in a circular motion. Be cautious not to apply excessive pressure or force, as it may damage the pen or cause oil leakage.
- Release any air bubbles trapped in the oil: As you move the toothpick around, you will notice air bubbles rising to the surface of the oil. Continue to gently swirl the toothpick until all the air bubbles are released.
Example: Insert the toothpick into the pen’s opening and gently move it in a circular motion. Keep doing this for about 30 seconds, making sure to cover the entire area inside the pen. You will see small air bubbles rising to the surface of the oil.
Replace the cartridge
To put the ink cartridge back into the pen, follow these steps:
- Remove the cap from the pen and locate the empty cartridge.
- Take the new cartridge and align it with the slot where the old one was.
- Push the cartridge gently into the slot until it fits snugly.
- Once the cartridge is securely in place, replace the pen cap.
For example, if you are using a ballpoint pen, you would remove the cap, locate the empty cartridge, take the new cartridge, align it with the slot, push it gently until it fits snugly, and then replace the cap. If you are using a fountain pen, you would follow the same steps, but instead of pushing the cartridge, you may need to twist it or insert it into a special chamber.


Seal the pen
- Put the cap back on if your pen has one, to effectively seal the cuticle oil.
- Cover the pen tip with a small piece of plastic wrap.
- Secure the plastic wrap in place by wrapping a rubber band around it.
- Ensure a tight seal to prevent any leakage or evaporation of the cuticle oil.
Test the pen
Test the pen by applying a small amount of cuticle oil on a patch of skin. Gently rub the oil into the skin to ensure it spreads evenly and smoothly. Observe for any signs of irritation or discomfort.
Apply the oil
To apply the oil, gently twist the pen to release a small amount of cuticle oil onto your nails and cuticles. Using your fingertips, massage the oil into your nails and cuticles in a circular motion. Make sure to cover all areas and allow the oil to absorb fully.
Store the pen
When not in use, store the cuticle oil pen in a cool, dry place to maintain its freshness and prevent leakage. Find a designated spot in your beauty cabinet or drawer where the pen can be kept upright and away from direct sunlight or excessive heat. Avoid storing it in areas with high humidity, such as the bathroom, as this can cause the oil to deteriorate and the pen to leak. Ensure the cap is tightly secured to prevent air from entering and compromising the quality of the product. By following these simple storage guidelines, you can ensure that your cuticle oil pen remains in optimal condition for longer use.
Refill the pen
To refill the pen with cuticle oil, follow these steps:
- Unscrew the pen: Twist the cap of the pen counterclockwise to unscrew it. This will expose the refillable compartment of the pen.
- Prepare the cuticle oil: Get a bottle of cuticle oil that you want to refill the pen with. Make sure it is the same type of oil that was originally in the pen.
- Fill the pen: Carefully pour the cuticle oil into the refillable compartment of the pen. Use a small funnel if necessary to avoid spills. Fill it up until it reaches the desired level.
- Screw the pen back together: Once you have filled the pen, screw the cap back on by twisting it clockwise. Make sure it is securely tightened to prevent leakage.
Example: As you run out of cuticle oil, simply unscrew the pen and refill it using the same steps outlined above. For instance, if you have a pen with a brush applicator, you can easily remove the brush and pour the cuticle oil directly into the pen. Alternatively, if your pen has a removable cartridge, take it out, refill it with cuticle oil, and insert it back into the pen. Remember to tighten the cap properly to avoid any spills or leaks.
Final thoughts and recommendations
In conclusion, making your own cuticle oil pen is easy and cost-effective. With just a few ingredients and a bit of effort, you can provide your cuticles with the nourishment they need for healthier, stronger nails. Say goodbye to dryness and hello to beautiful nails by taking control of your cuticle care.
Necessary Supplies


Nail Care Hacks
DIY Guide: Crafting High-Quality Cuticle Oils for Nails, Including Tips for Selling
Instructions for application and benefits of using a cuticle oil pen
- Remove the cap from the cuticle oil pen
- Twist the bottom of the pen to dispense a small amount of oil onto the brush or rollerball
- Gently brush or roll the oil onto your cuticles, starting from the base of your nails and moving towards the tips
- Massage the oil into your cuticles using circular motions for better absorption
- Allow the oil to sit for a few minutes to moisturize and nourish your cuticles before wiping away any excess
Frequently Asked Questions about Cuticle Oil Pens
Can a cuticle oil pen help strengthen my nails?
Yes, a cuticle oil pen can help strengthen your nails. Cuticle oil contains nourishing ingredients such as vitamins, minerals, and essential oils that can provide hydration and moisture to the nails and cuticles. By keeping the nails and cuticles moisturized, the oil helps to prevent dryness, brittleness, and breakage, which in turn can strengthen the nails. Additionally, cuticle oil can also improve the overall health of the nail bed, promoting healthier and stronger nail growth.
Can a cuticle oil pen be used as a nail polish remover?
No, a cuticle oil pen cannot be used as a nail polish remover. Cuticle oil is specifically designed to moisturize and nourish the cuticles and skin around the nails. It does not contain any ingredients that are effective in removing nail polish. Nail polish removers, on the other hand, are formulated with solvents that break down and dissolve the polish, allowing it to be easily wiped away. Using a cuticle oil pen as a nail polish remover would not effectively remove the polish and could potentially damage the nails or leave behind residue.
Are there any specific instructions on how to use a cuticle oil pen?
Yes, there are specific instructions on how to use a cuticle oil pen. Here is a general guideline:
- Start by ensuring that your hands and nails are clean and dry.
- Twist the cap or end of the cuticle oil pen to reveal the brush or applicator.
- Gently brush or dab the oil onto each cuticle, focusing on the area where the nail meets the skin.
- Massage the oil into the cuticles using circular motions to promote absorption.
- Allow the oil to sit on your cuticles for a few minutes to nourish and moisturize.
- If desired, you can also apply the oil to the rest of your nails for added hydration.
- After application, rinse off any excess oil from your hands if preferred.
- Repeat the process regularly, ideally daily, for best results in maintaining healthy cuticles.

Hey, I’m Ava Wilson—a skincare enthusiast and a certified esthetician. I’m dedicated to sharing my knowledge and empowering others to achieve healthy, glowing skin through simple, effective routines and natural remedies. Join me on this exciting skincare journey, and let’s unlock your skin’s potential for a confident, beautiful you.