
Get Ready Fast: Flawless Face in Five Minutes
Polished 5-minute makeup fits hectic mornings. I’ll show six easy, repeatable steps to build a fresh, camera-ready face fast. No heavy techniques or overflowing products—just practical, confidence-boosting moves you can do every day in minutes, not hours—really now.
What You’ll Need

5-Minute Everyday Makeup Tutorial: Quick, Easy Beauty Routine
Prep Like a Pro in 60 Seconds
Skip the fuss—hydration and a light base beat heavy foundation every time. Want dewy skin without cakiness?Start with clean, moisturized skin.
Spritz a hydrating mist or apply a lightweight moisturizer with SPF if you have time.
Apply a small amount of tinted moisturizer or BB cream with your fingers or a damp sponge, focusing product on the center of the face and blending outward.
Pat concealer only where needed—under eyes and on blemishes—to preserve a skinlike finish.
Dab product with fingers for fastest blending if you’re rushing to coffee; use a sponge for a softer, airbrushed look.
Follow these quick cues:
Finish by lightly dusting translucent powder only where you need it (T-zone) to control shine without flattening the glow.

Quick Conceal and Brighten
Tired eyes? A little targeted concealer beats hours of sleep—here’s the cheat code.Apply concealer in an upside-down triangle under each eye to brighten and lift; blend by tapping with a damp sponge or a clean finger. Dab a tiny dot on redness or blemishes and press it into skin—use an exact-match shade for spots.
Choose shades like this:
Blend edges well so there are no harsh lines. For a real-world shortcut, imagine you’re on your morning commute: quick triangle, blend, dot inner corner, swipe a finger to soften. Set only the inner eye area with a whisper of translucent powder to prevent creasing.

Brows: Frame Your Face in 30 Seconds
Bad brows age you faster than you think—fill, brush, and go. One bold move, big payoff.Use a brow pencil or tinted gel to fill sparse areas with short, hairlike strokes following your natural arch.
Keep the front of the brow lighter and feathered for a modern, youthful effect.
Brush through with a spoolie to blend and soften any harsh marks.
Replace multiple steps by combing tinted brow gel through brows to add color and hold.
Let well-groomed brows instantly lift the eye area and structure the face, making minimal makeup look polished.
Quick tool choices:
Try this combo for a meeting: pencil sparse spots, spoolie to blend, then gel to set.

Five-Second Eye Routine
No eyeliner? No problem. Create definition with powder and mascara—fast, forgiving, and flattering.Sweep a neutral matte shade across the lid and slightly into the crease to add dimension — use matte beige, taupe, or soft brown. Keep strokes light; a finger or fluffy brush works fine.
Use a slightly deeper shade at the outer corner and softly blend with small circular motions. Don’t aim for precision — diffuse the edge for a lived-in look.
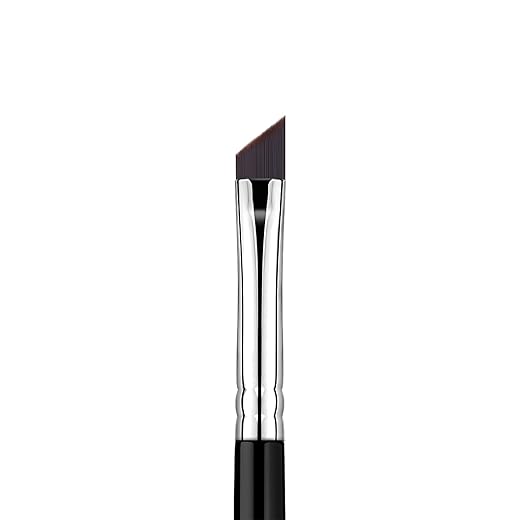
Skip complicated liners and tightlines. Instead, run a dark brown shadow along the top lash line with a small angled brush, pressing and smudging for subtle definition.
Finish with one or two quick coats of mascara, wiggling at the base to lift and separate lashes. If you want more brightness, dab a tiny shimmer (champagne or pearl) at the inner corner. This opens the eyes while staying quick and smudge-proof.
Quick tools to grab:
Cheeks and Color: Creams Win
Cream blush and lip tint are your two-minute glow hack—blend with fingers for a lit-from-within look.Apply a cream blush to the apples of your cheeks and blend upward toward the temple with fingers or a sponge to mimic a natural flush. Dot with your ring finger, then tap and sweep — it takes seconds and looks like real skin.
Use the same cream on your lids as a quick shadow to sync tones: peach for warmth, rose for cool undertones. If you’re running late, dot-cheek, swipe-lid, and go.
Choose a tinted balm or stain for lips. Swipe once, press lips together, then blot to set. Or use the same cream on lips for a monochromatic, cohesive look.
These steps add life to the complexion and tie the face together without precision tools.

Set and Finish: Seconds That Matter
Lock it in without looking powdery—little tricks for all-day wear and camera-ready skin.Set the face: lightly dust translucent powder where you need oil control, then use a setting spray or facial mist to melt products together and remove any powdery finish.
Spritz once or twice to boost longevity and keep the look natural — don’t soak your face; a light mist blurs powder into skin and freshens makeup.
For an extra lift, lightly highlight the tops of cheekbones and the bridge of the nose with a subtle luminizer. Now you’re ready—polished, fresh, and out the door.

You’re Done — Effortless Every Day
With practice these six steps become a quick, reliable routine—try it tomorrow, tweak products to your style, then share your five‑minute results and tag us to inspire others now online.

Hey, I’m Ava Wilson—a skincare enthusiast and a certified esthetician. I’m dedicated to sharing my knowledge and empowering others to achieve healthy, glowing skin through simple, effective routines and natural remedies. Join me on this exciting skincare journey, and let’s unlock your skin’s potential for a confident, beautiful you.


Nice guide — I appreciate the emphasis on creams. A tip that helped me: warm the cream product on the back of your hand first, then press it into the skin. It blends faster and looks less streaky.
Also, if you have oily skin, pat a tiny translucent powder over the T-zone after ‘Set and Finish’ — just a dab, not a full dusting.
Would love a short vid showing the prep step in real time though.
Oily skin hack noted. I always feared powder would cake, but that tiny dab trick sounds promising.
That hand-warming trick is underrated. I do the same for cream bronzers.
Great tip about warming the cream — thanks for sharing, Rachel! We’re working on a quick demo video for the prep step, so stay tuned.
Also works with lip tints — smoother application if warmed first.
Short vid would be 10/10. Sometimes reading steps doesn’t translate to actual speed.
I really wanted this to work for me. Followed the guide exactly and still felt like something was missing.
– Prep felt great
– Concealer/brighten was okay
– But my makeup melts off after a couple hours (humid city)
Any tips for longevity without adding a bunch of extra products? I need sweat-proof, not cakey.
I blot instead of powdering during the day — keeps things from getting heavy. Also carry blotting papers.
Humidity is tough. For longevity without heaviness: prioritize a lightweight mattifying primer only on the T-zone, use cream products sparingly, and set key areas with a tiny amount of translucent powder. Also, a light mist of long-lasting setting spray can help without feeling cakey.
Try layering: cream product first then a micro amount of matching powder to lock it in. Keeps the dewy look but lasts longer.
If I could do this routine in 5 minutes, I’d have time to overthrow a small country. Kidding. Mostly.
Actually, love the simplicity. The five-second eye routine is my kinda energy.
Haha love the ambition, Omar. Start with the eye routine and see how many extra minutes you gain — you might just rule your morning!
Don’t overthrow anything before coffee. Priorities 😂
Love this — actually tried the five-second eye routine this morning and it saved my life 😅. Prep in 60 seconds is my new mantra. The cream blush tip is genius, btw. Will try the brow trick next time!
Which eye product did you use? I always end up with raccoon eyes lol
Totally agree about tapping! I used to overblend with a brush and it just disappeared.
So glad it helped, Emily! If you want, try tapping the cream blush with your fingers for a more natural finish — works great on dry skin.
Okay, honest opinion: This is cute and all, but 5 minutes? I need a little reality check.
I can do the skin prep and concealer in that time maybe, but brows AND eyes AND cheeks AND setting? Not unless I’m half-asleep and don’t care about symmetry.
Still, good for those rushing to work. Might practice a few times and see if muscle memory saves me.
I felt the same at first, but after a week I cut my time down to about 6-7 mins. It’s mostly about simplifying tools.
Fair point, Marcus — 5 minutes is definitely an aspirational goal for many. The guide is mostly about streamlining steps and reusing multitasking products to shave time off. With a little practice, most people get much faster.
Super helpful — I actually love the no-fuss vibe. My mornings are chaos and this guide made me feel like maybe I can look put together without an extra hour.
That’s exactly the goal, Priya. Start with the basics and build a routine that fits your mornings!
Same! Tried it this week and felt more confident heading out. Tiny wins.
Could someone recommend a beginner-friendly cream blush and a no-fail concealer for under-eyes? My dark circles are the real MVP and I need something foolproof. Thanks!
For beginners, try a cream stick blush (easy to finger-tap) — something like a hydrating formula with a bit of pigment. For concealer, a peach-toned corrector under a lightweight concealer helps with dark circles. I’ll post specific product recs in the comments later today!
I mix a tiny bit of peach corrector with my regular concealer. Game changer for blue-ish circles.
Maybelline Fit Me concealer is cheap and decent. For cream blush, cream bronzer sticks double as blush for me.
Glossier Cloud Paint is so easy to blend with fingers — very beginner friendly.
Brows in 30 seconds? Challenge accepted. I use a tinted brow gel and a spoolie — done in like 45s. Any tips to go under 30 without looking like a caterpillar?
Don’t overcoat — one clean swipe and then fluff with a spoolie. Too much product = caterpillar energy.
If you have sparse spots, dot a pencil only where needed, then gel. Saves time vs full penciling.
Tinted brow gel + a quick brush-up works well. For under-30s, focus on the arch first and lightly drag outwards; the goal is shape not filling every gap.
Quick shoutout: this guide made me ditch my 12-step routine. Still not flawless, but 5 extra minutes in bed = priceless ❤️
Also, lil typo in step 3? It says ‘Frame Your Face in 30 Secs’ and then mentions 45 sec technique lol. Not a big deal but noticed 😄
Thanks for the catch, Natalie — we’ll fix that inconsistency! And yes, reclaiming 5 minutes of sleep is a valid beauty investment 😉
Ha I misspelled so many steps in my head, glad someone else finds the timing flexible 😂
Concealer + brightening step: I usually dot in triangles under my eyes and blend with a sponge. Quick question — do you recommend a damp or dry sponge for the fastest finish? I’ve been switching and can’t decide.
Pro tip: keep a tiny travel sponge in your makeup bag dried but spritz with setting spray before using — gives a similar damp effect without prepping it every morning.
If you’re in a rush, fingers can be fastest — warmth helps blend concealer quickly.
Damp sponge typically gives a quicker, more seamless finish because it sheers products out while blending. If you’re pressed for time, a slightly damp sponge is your friend.
Damp for sure. Dry sponges soak up too much product and slow you down having to add extra.