Why a Dewy, Natural Makeup Look Works
A dewy, natural makeup look is a skin-forward approach that enhances rather than masks. It aims for radiant skin, subtle definition, and a healthy glow. This style flatters busy people who want an effortless polish, those with normal to dry skin, and anyone who prefers minimal makeup. The focus is on freshness and simplicity.
This tutorial covers six easy steps: skin prep, a lightweight base, targeted conceal and correct, cream blush and bronzer, soft eyes and natural brows, plus finishing techniques to lock in dewiness. Expect about 15 to 25 minutes of effort for a polished, everyday glow that feels like your best skin, not a heavy face. You’ll look refreshed and confident.


Dewy Makeup Tutorial: Fresh, Radiant Skin in Minutes
Step 1 — Skin Preparation: Cleanse, Hydrate, and Prime for Glow
Cleanse to start fresh
Begin with a gentle, non-stripping cleanser that removes oil and impurities without leaving skin tight. For example, CeraVe Hydrating Cleanser or La Roche-Posay Toleriane are great daily options. Think of cleansing like blanking a canvas: you want a clean surface, not an overworked one.
Hydrate and plump
After cleansing, mist or pat in a hydrating toner or essence to boost moisture immediately. Lightweight essences like Klairs Supple Preparation Toner or Hada Labo Gokujyun add an initial layer of hydration that helps makeup sit softly.
A targeted hyaluronic serum plumps fine dryness lines and gives that “skin-from-within” dewy base. Apply while skin is slightly damp to lock in moisture — one of the small habits that makes a noticeable difference in how foundation blends.
Moisturize for your skin type
Choose a balancing moisturizer that fits your skin:
If you’ve ever had makeup pill, it’s often from layering incompatible silicones or not letting products settle — wait ~30–60 seconds after moisturizer before priming.
Sunscreen and dew-enhancing primers
Daytime looks require SPF. Pick a hydrating, non-pilling option like EltaMD UV Clear (good under makeup) or Supergoop! Glowscreen for extra radiance. For primers, choose luminous or hydrating formulas (NARS Light Reflecting Primer, Milk Hydro Grip for hold) or silicone-free hydrating bases if your skin is reactive.
Apply primer in small dots, warm between fingers, then press — don’t rub — to preserve moisture and avoid disrupting the skin’s surface.
Under-eye and lip prep
Pat a lightweight eye cream (Kiehl’s Avocado Eye Cream or The Ordinary Caffeine Solution) into the orbital bone. Exfoliate lips gently with a sugar scrub or balm; follow with a moisturizing lip balm like Laneige Lip Sleeping Mask for smooth application of any lip tint.
Do’s and don’ts for prepping skin:
Ready to build the base? Next up: a lightweight foundation that enhances, not hides.
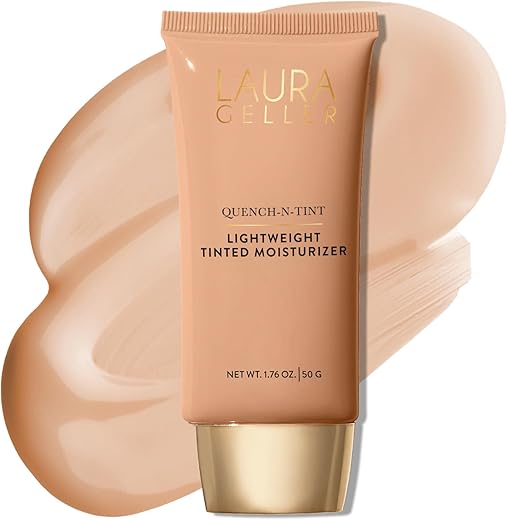
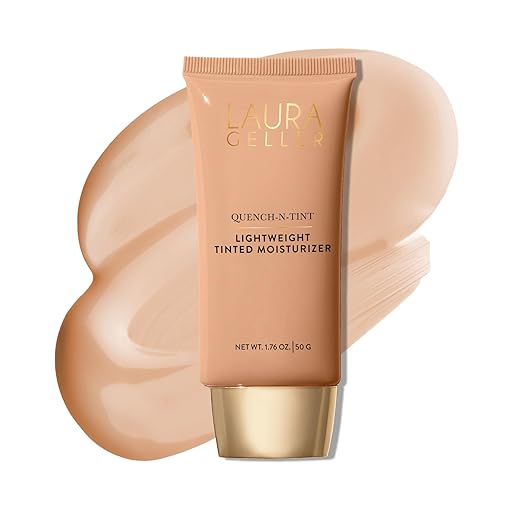
Step 2 — Lightweight Base: Tinted Moisturizer and Sheer Coverage Techniques
Choose the right formula and undertone
For a skin-like finish pick between a tinted moisturizer, BB/CC cream, skin tint, or a lightweight luminous foundation. Look for words like “sheer,” “skin tint,” or “hydrating.” Test along the jawline in natural light — the shade should disappear into your neck. If a shade looks ashy on deeper tones, try a warmer or neutral option; if it goes orange after 10–15 minutes, choose a slightly cooler or more neutral undertone or test another formula that doesn’t oxidize.
Step-by-step application routine
Technique variations
Blending and spot-layering
Mix-ins and how much to add
Troubleshooting quick fixes
Next: targeted concealing to keep your skin luminous without masking it.
Step 3 — Conceal and Correct: Targeted Coverage Without Masking Skin
Pick the right concealer texture
Choose creamy, hydrating formulas for the under-eye to avoid settling into fine lines — think NARS Radiant Creamy Concealer or Maybelline Fit Me. For blemishes, a slightly thicker, medium-coverage concealer (e.g., a stick or cream formula) gives spot coverage without needing heavy layering. Under-eye: one shade lighter if you want a subtle brighten; spots: exact match to your skin tone.
Color-correcting basics
Color correctors are tiny problem-solvers, not full-face products. Use them sparingly:
Apply a pea-sized dot of corrector only where needed, feather the edges, then top with concealer — this keeps results natural.
Step-by-step application
Setting and longevity tips
Step 4 — Cream Blush, Bronzer, and Subtle Contour for Natural Dimension
Why creams blend best with a dewy base
Cream and liquid color sits in the skin rather than on top of it, so it mimics natural oil and translucency. Think of it like adding a sheer layer of pigment that moves with your skin—less cakey, more skin-like. Many makeup artists prefer creams for natural looks because they maintain luminosity through the day.
Where to place color for a lifted, natural effect
Tools & blending techniques
Shade selection & avoiding muddiness
Highlighting, balancing, and quick fixes
Add a drop of liquid highlighter to the tops of cheekbones, bridge of nose, and Cupid’s bow; blend so it reads like hydrated skin, not glitter. To tone a too-shiny area, lightly press translucent powder with a puff. If you’ve overdone color, gently dilute with a dab of moisturizer or a thin swipe of foundation and re-blend. For touch-ups, multi-use balm sticks (e.g., ILIA Multi-Stick, Rare Beauty’s stick blush) are perfect for on-the-go sheen and color refresh.
Next up: we’ll define soft eyes and natural brows to keep the whole look cohesive and low-contrast.
Step 5 — Soft Eyes and Natural Brows: Definition Without Drama
Prep the lids — even tone, not a matte mask
Use a pea‑size dot of lightweight concealer or an oil‑balancing, illuminating primer to neutralize redness and veins. Tap with your ring finger or a small sponge—pat, don’t drag—to keep texture visible. Choose a sheer formula (think NARS Radiant Creamy Concealer or an ophthalmologist‑tested eye primer) if you have sensitive eyes.
Shadow choices & gentle application
Stick to skin‑toned mattes and satins: soft taupe, warm brown, light champagne for inner‑corner lift. Apply a light wash across the lid with a fluffy brush; this creates a unified canvas without heaviness. Using a small, tapered brush, deepen the crease with short back‑and‑forth motions—build slowly until you see a soft shadow, not a line. For near‑lash definition, smudge a tapered brown pencil or a dense shadow along the upper lash line with an angled brush; it reads like depth, not eyeliner. Favor satin or soft pearl finishes over chunky shimmer to keep the look dewy and modern.
Lashes — length and separation
For lashes, use a lengthening, natural‑finish mascara and apply with a light hand: wiggle at the base, sweep up, and comb through any clumps with a clean spoolie. If you prefer a barely‑there look, clear mascara separates and sets lashes without pigment.

Occasional liner: opt for brown or deep plum, press it into the base and smudge immediately for warmth vs. precision liner. For sensitive eyes, choose hypoallergenic, fragrance‑free formulas.
Brows — hair‑like fills and soft hold
Fill sparse spots with fine, hair‑like strokes using a micro pencil (Anastasia Brow Wiz style) or micro‑filling pen. Brush through with a spoolie to blend and soften. Finish with a tinted or clear gel that holds but remains flexible—no crunchy brows.
Quick looks for different occasions
Next up: finishing touches and longevity tips to keep this dewy eye look all day.
Step 6 — Finishing Touches and Longevity: Seal the Dewy Look
Targeted setting: where to set and where to leave the glow
Finish purposefully: lightly set the T‑zone (forehead, nose, chin) if you tend to shine, and deliberately leave the cheeks, brow bones and nose bridge soft and luminous. Use a very small amount of finely milled translucent powder applied with a fluffy brush to blur oil and keep pores discreet. For heavier control, press the same powder with a damp sponge only on the exact oily spots — this avoids flattening surrounding glow.
Setting sprays that meld products and revive finish
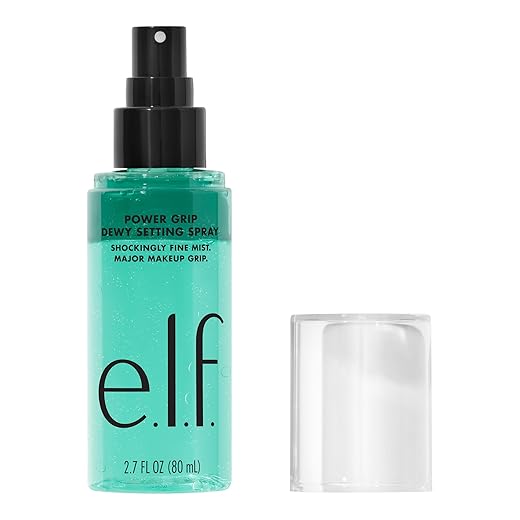
A hydrating or dewy setting spray is your secret to removing any powdery texture and making everything look skin‑borne again. Spritz from arm’s length and let the mist settle; it melts layers together without sliding makeup. Lightweight options range from classic MAC Fix+ to richer hyaluronic mists.
Touch‑ups and travel essentials
For midday refreshes: blot first—don’t rub—to remove excess oil, then revive skin with a quick spritz of hydrating mist or a tiny dab of cream blush/highlighter on the apples and high points. Travel-size cream sticks (Glossier Cloud Paint or Milk Makeup Lip + Cheek formats) are ideal for on‑the‑go layering without caking.
Climate and skin‑type adjustments
Quick troubleshooting
Packing checklist — essentials to maintain dewy skin on the go:
Next: final notes on practicing, personalizing, and keeping your dewy ritual fresh.
Final Notes: Practice, Personalize, and Keep It Fresh
Prioritize skin care, reach for lightweight, skin-like formulas, and blend strategically so coverage feels natural and luminous. Build with thin layers—tinted moisturizers, cream color, and targeted concealer—to enhance, not mask, your skin.
Experiment with textures and tools to find what flatters your face and skin type; small adjustments—placement, pressure, and product amount—extend wear while preserving dewiness. Remember: the goal is healthy radiance, so practice, personalize, and enjoy the process and have fun.

Hey, I’m Ava Wilson—a skincare enthusiast and a certified esthetician. I’m dedicated to sharing my knowledge and empowering others to achieve healthy, glowing skin through simple, effective routines and natural remedies. Join me on this exciting skincare journey, and let’s unlock your skin’s potential for a confident, beautiful you.


Quick question for anyone: do you do your brows before or after the base? I usually mess up my forehead when I try to shape brows after foundation.
Also, I started using Hyaluronic Acid 2% + B5 Hydration Serum at night per the article and noticed my skin drinks it up. Is it okay to use both morning and night?
I do brows after base but before blush/bronzer — helps me place the face color. And yes, serum twice daily helped my hydration without irritation.
Good Q — I recommend shaping/defining brows after base if you want to see how the color sits against skin, but do light strokes so you don’t need heavy touch-ups. As for the serum, it’s generally fine AM and PM; if you layer sunscreen in the morning afterward that’s the important part.
Long-winded tip post incoming (sorry lol) — I’ve been doing dewy looks for years and these tweaks helped:
1) Use Dream Fresh 8-in-1 Hydrating BB Cream on no-makeup days for even tone and SPF convenience.
2) For cream blush, warm it on the back of your hand first so it sheers out easier.
3) Sun Sculpt Liquid Contour Stick Warm Honey is my go-to; blend with a tiny flat brush for natural shadow.
4) Finish with Power Grip Dewy Setting Spray but give it 60s to sink in before touching your hairline.
Hope that helps someone. Also, tip: if you have oily lids, use a small amount of translucent powder before mascara — Lash Princess plays nice with prepped lids.
Fantastic roundup, Olivia — thanks for the detailed steps. The 60s wait time for the spray is a pro tip I’ll highlight in the article edit.
All hail the hand-warming of products. My microwave tried to help once and now it doesn’t trust me.
These are solid. Especially the flat brush trick for contour blending — changed the game for me.
Not thrilled — I bought Quench-n-Tint Hydrating Foundation Light to Medium based on this and it oxidized darker than my neck. The article mentions sheer coverage but didn’t warn about shades shifting.
I tried mixing Dream Fresh 8-in-1 Hydrating BB Cream to tone it down but still off. Kinda bummed and wish there were more shade-match tips here.
Bring it back? Some Amazon sellers accept returns for shade mismatch. Might be worth trying.
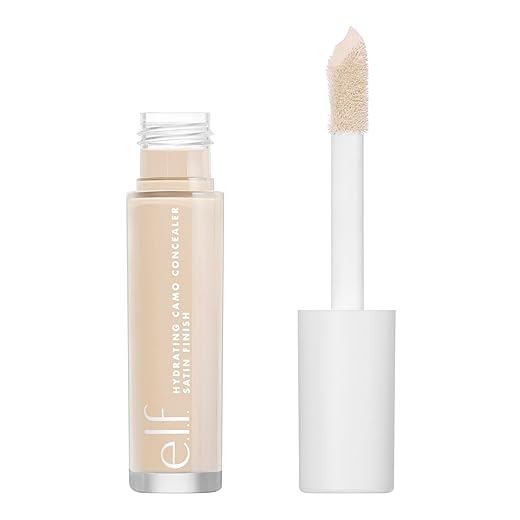
Sorry you had that experience, Ravi. Oxidation can be product- and skin chemistry-specific. A few things that help: 1) test on jawline and wait 10–15 minutes before buying, 2) mix a drop of a lighter BB or a touch of concealer (Hydrating Camo Fair Warm) to adjust, or 3) apply a tiny amount of face oil after to slightly alter finish. We’ll add a shade-match warning to the article — thanks for flagging it.
I felt the same way once — a thin layer of Dream Fresh mixed with the Quench-n-Tint helped for me. Also check lighting when swatching (natural light FTW).
If it’s oxidation, try using the Hyaluronic Acid 2% + B5 first and let it absorb fully before the tint — sometimes the interaction with skin oils causes the shift.
Quick note — the finish is stunning but I struggled with lasting power on humid days. I followed Step 6 and used Power Grip Dewy Setting Spray with Hyaluronic but after 6 hours it started to slip on me.
Anyone else have tips for making a dewy look survive heat without turning into an oil slick? 😅
Great point, Maya. For humid days I recommend: 1) very light application of the Quench-n-Tint (thin layers), 2) blot with a tissue in the T-zone before setting, then 3) a couple of light mist layers of Power Grip spray from farther away. Also avoid heavy cream bronzers in the center of the face — stick to cheek placement.
I have the same issue. I pat a tiny bit of translucent powder only on my nose and forehead after Step 3, then mist. Keeps things in place without mattifying the whole face.
Love this guide — finally something that isn’t trying to cake my face 😂
Tried the Quench-n-Tint Hydrating Foundation Light to Medium after Step 2 and it actually blended into my freckles without covering them up (huge win). Paired it with the Hyaluronic Acid 2% + B5 Hydration Serum per Step 1 and my skin looked less textured by midday.
One tip: warm the product on your fingers first for extra melt-in effect.
Agree with the warming trick. Also try using a damp sponge to press in layers — keeps coverage sheer but adds longevity.
So glad it worked for you, Lucas! Warming the product is a great hack — helps with sheer coverage and keeps the dew. If you ever want a swatch comparison with Dream Fresh 8-in-1 Hydrating BB Cream, I can add one to the article.
Omg yes the serum + tint combo is magic. I mix a tiny bit of Power Grip Dewy Setting Spray into my tinted moisturizer on no-makeup days for glow that lasts.
Funny guide. I read “Lash Princess” and thought it was a royal appointment for my lashes. Spoiler: no crown, just phenomenal separation. Gave me the false lash vibe without glue and drama.
Also low-key obsessed with Sun Sculpt Liquid Contour Stick Warm Honey — actually looks like a shadow and not a swipe of dirt on my cheekbones.
Lash Princess + a tiny coat of clear mascara on top gives insane hold for humidity days.
Tom you crack me up. Quick tip: blend the contour stick with a dense brush in circular motions — more natural than swiping with fingers.
Mascara crown would be an aesthetic. Also, try wiggling Lash Princess at the root and then feathering upwards for more lift.
Ha! If we ever do a ‘royal’ edition of the look, we’ll add tiny tiaras for mascara wands 😂 Glad the stick worked for you — it’s meant for subtle shadowing so it shouldn’t read too harsh.
Really enjoyed the step order — starting with hydration (Step 1) totally changed my base routine. I used Hydrating Camo Full-Coverage Concealer Fair Warm only where needed (under eyes and a few spots) per Step 3 and it looked skinlike.
Would love a short video demo for the cream blush placement in Step 4 though — that’s the one move I still overdo sometimes.
Agree on less is more for cream blush. Build slowly — can always add but hard to take away.
If you’re contouring, put blush on top of contour, not under. Keeps the face looking lifted.
Thanks Sophie — glad the concealer method helped. We’re planning a quick video demo for cream blush placement (cheek apples, upward blend toward temple, small amount on bridge of nose if you like). Expect it in a site update soon.
Yess a vid would help! My trick: tap blush on with ring finger and then buff out with a duo-fiber brush for soft diffused color.