Glow Up: Get Dewy, Healthy-Looking Skin with Makeup
I know you want glow without cake. Fun fact: your skin renews itself constantly. This six‑step routine combines gentle prep, light-reflecting products, and smart setting to give dewy, healthy-looking skin fast—no heavy layers, just a natural, lit-from-within glow every day.
What you'll need

Matte vs. Dewy Makeup Tutorial: Which Finish Wins for Your Skin?
Prep the Canvas: Cleanse, Exfoliate, and Hydrate
Skip the cakey base—start clean and thirsty! Ready to give your skin actual moisture instead of slapping it on later?Begin with a gentle cleanser to remove oil and prepare skin for makeup. Exfoliate 1–3× weekly with a light chemical exfoliant (AHA like glycolic or mandelic) or a very gentle physical option (konjac sponge or soft scrub) to smooth texture. Apply a hyaluronic acid serum to damp skin, then a lightweight moisturizer—choose a gel-cream for oily/combination skin or a richer lotion for dry skin. Allow products to absorb for a minute or two before starting makeup.
Begin with a gentle cleanser to remove oil and buildup; a light chemical or physical exfoliation a few times weekly smooths texture for even makeup. Follow with a hydrating serum (hyaluronic acid) and a lightweight moisturizer suited to your skin type—oily skin benefits from gel creams; dry skin from richer lotions. Allow products to absorb fully (a minute or two) so makeup sits on hydrated skin. If daytime, finish with SPF or a moisturizer containing SPF. Prepping this way ensures makeup blends seamlessly and that the final glow looks skin-like rather than oily or patchy.

Prime for Radiance: Choose a Luminous Base
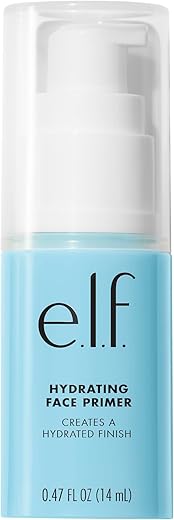
Can a primer make you glow like a filter? Yep—pick the right one and your camera will thank you.Select a luminous or hydrating primer to create an instantly dewy canvas. Use silicone-free primers with light-reflecting particles, or mix a tiny drop of facial oil into your primer or foundation for a skin-from-within sheen.
Apply sparingly to the high points—cheekbones, forehead, bridge of the nose, and chin—and blend outward with fingers or a damp sponge. Avoid piling product on very oily zones unless you plan to mattify later.
For combination skin, balance products: hydrate cheeks and soften texture, while taming the T-zone with a light mattifying primer. Priming evens texture, prolongs wear, and ensures the glow reads like skin, not product buildup.
Pick a Lightweight Luminous Base: Buildable Coverage
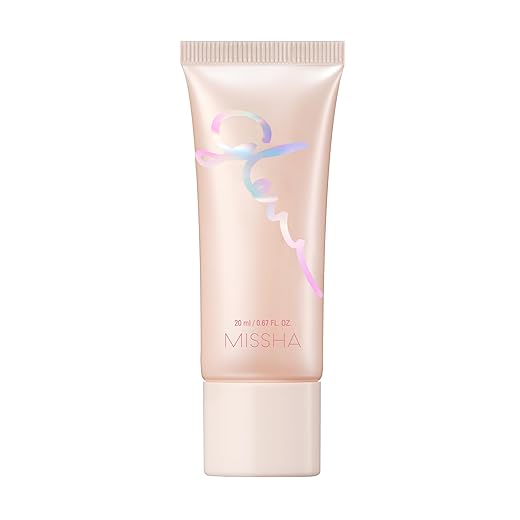
Why heavy foundation kills your glow—and what to use instead. Hint: less is more, and your sponge is your friend.Choose a lightweight, hydrating base that reads like skin. Apply a tinted moisturizer, BB/CC cream, or a light luminous foundation in thin layers. Start where you need coverage and leave other areas sheer.
Press product into skin with a damp sponge for a natural, skin-like finish. Build slowly—pat and blend rather than swipe to avoid streaks or cakiness.
Opt for tinted moisturizers, BB/CC creams, or lightweight hydrating foundations with a luminous finish. Apply thin layers and build coverage only where needed—use a damp sponge to press product into skin for skin-like finish. Place concealer strategically on hyperpigmentation and under eyes rather than a full heavy layer. Match shade and finish to skin tone and undertone to avoid ashy or overly shiny results. Keep SPF in mind; some formulas with high SPF can look thicker—adjust with thinner layers. The goal is evened skin with translucence rather than full-on mask coverage.

Creams Over Powders: Sculpt and Warm with Cream Products
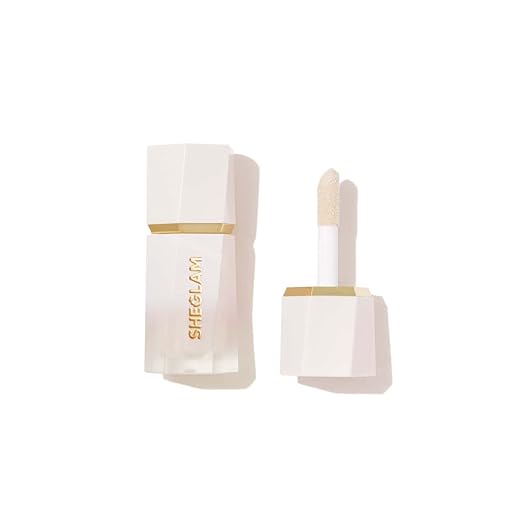
Creams are the secret—think glossy apples, not matte cardboard. Want a youthful flush? Stop powdering everything.Use cream bronzer and blush to add warmth and dimension without flattening the skin. Dab cream bronzer into the hollows of your cheeks and blend upward toward the temple to lift—think soft, sun-kissed shadows rather than harsh contour lines.
Apply cream blush to the apples of your cheeks (smile to find them) and sweep back toward the hairline for a skin-like flush. Layer a cream highlighter on top of cream blush for a believable, melded sheen.
Powder only sparingly—set the center of the face if you struggle with oil but leave cheeks and high points dewy. Layering creams creates depth and a reflective finish that mimics natural skin oils.

Strategic Highlighting: Placement and Product Pairing
Highlight without looking like you dipped your face in oil—placement beats intensity every time.Choose subtle luminous products: liquid illuminators, balm highlighters, or cream sticks. Pick a shade that’s a tone lighter than your skin for natural reflect.
Apply a tiny amount to the high points and blend outward so sheen fades into skin.
Dot and press; never swipe heavy lines. Dot a pearl liquid across cheekbones and press with your ring finger for a believable glow—think pinpoint light, not streaks.
Avoid chunky glitter—opt for finely-milled pearlescent or dewy formulations.
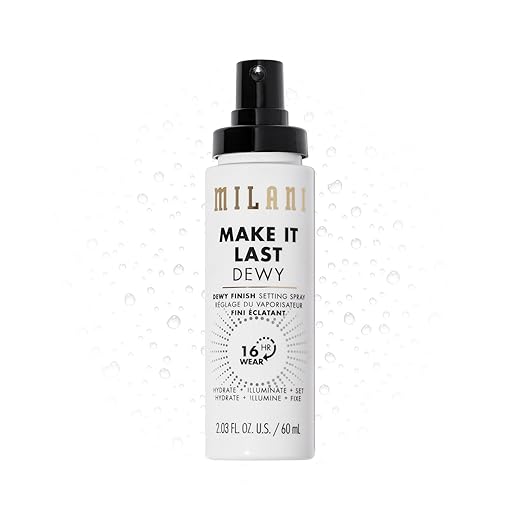
Layer a cream highlighter first, then spritz a dewy setting spray to amplify without adding grease. This technique gives dimension and catches light without exaggerating texture.
Set Smart and Maintain: Lock Glow Without Losing Dew
Long-lasting glow? Yes—here’s how to survive humidity and meetings without becoming an oil slick.Finish with a lightweight, dewy setting spray to meld layers and add longevity. Mist once from arm’s length, let it settle, then press gently with a damp sponge where you want extra adherence (cheeks, chin).
If you need oil control, blot with papers (press—don’t wipe) and reapply cream products in touch-up zones rather than powdering heavily. Carry a mini cream blush or cushion compact for refreshed dew during the day.
Night or event looks benefit from a final mist after hair and outfit are done to remove any powdery look and keep the skin luminous all day or night.
Dewy Skin, Simplified
Hydrate well, pick luminous, lightweight products, favor creams over powders, and set smartly to preserve a natural, dewy glow that lasts without looking greasy — ready to glow confidently every single day?

Hey, I’m Ava Wilson—a skincare enthusiast and a certified esthetician. I’m dedicated to sharing my knowledge and empowering others to achieve healthy, glowing skin through simple, effective routines and natural remedies. Join me on this exciting skincare journey, and let’s unlock your skin’s potential for a confident, beautiful you.


I read this while eating cereal and low-key tried the cream bronzer with my spoon (don’t ask) — turned out pretty decent 😂
The humor aside, I loved the simplicity of the steps. Also, shoutout to the ‘Dewy Skin, Simplified’ section — felt like permission to chill with my routine.
I tried spoon contour once by accident and it was catastrophic but fun.
Haha spoon technique might be a new makeup hack 🤔 Glad you enjoyed the simplified wrap-up!
Spoon contouring confirmed. Noted for future comedy.
Short and sweet: loved the placing tips for highlight — putting it on the upper cheekbone changed my whole face. Also, setting spray after highlight = key.
Exactly — setting spray melds cream/ liquid highlight into the skin for a natural finish. Glad it worked for you!
I have super oily skin and every time I try to go dewy, my forehead melts by noon. The guide says ‘set smart’ — but does that mean some powder? I hate the idea of powder!
For super oily skin: yes, a targeted approach is best. Use a lightweight primer that controls oil, set only the T-zone with a thin layer of translucent powder (press, don’t brush), then use a fine-mist hydrating setting spray to bring back any lost dew. A mattifying powder all over tends to flatten the glow.
Nice guide, but felt a little light on product recs. If you’re telling people to pick luminous primers and buildable bases, maybe give 3 tiers (drugstore, mid, high-end) so we don’t have to guess.
Also, some of us hate silicone primers — can you mention silicone-free options?
Good point, Emily. I’ll add tiered product suggestions and note silicone-free primer options in an update — thanks for the feedback!
Yes to silicone-free — it saved my skin from that weird slip some primers have.
This guide is so helpful — love the step-by-step layout.
I have combo skin (oily T-zone, dry cheeks) and I struggle with dewy looks turning into a greasy mess by afternoon.
Which step would you recommend tweaking first — the primer or the setting step?
Also: do you have recs for mattifying but luminous primers? Thx!!
I switched to a water-based luminous primer and it made SUCH a difference. Keeps the glow but less slip in my T-zone.
Great question, Sarah — for combo skin I’d tweak the primer and the setting step. Use a lightweight luminous primer but apply mattifying controls only to the T-zone (dabbing, not rubbing). For setting, a light dusting of translucent powder in the oily spots and a hydrating setting spray all over helps keep dew without the shine. Try a silicone-free luminous primer if you’re prone to oil build-up.
Agree with admin — totally zone your face. I pat a tiny bit of blotting powder on my nose midday and spritz dewy spray after and it looks intentional, not greasy.
This was actually a surprisingly straightforward read — I’ll try the buildable coverage method next weekend. Thanks for making it simple!
Let us know how it goes! First attempts are always messy but fun.
Glad it felt approachable, Lucas. Share a before/after if you can — readers love real results!
I tried ‘dewy’ once and looked like I had been deep-frying my face. Is there a guide for ‘glow that doesn’t scream grease’? Asking for a friend (me).
Quick q: should you wear SPF under a luminous primer? I hate when sunscreen pills up under makeup.
Any tips for layering sunscreen + luminous products without pilling?
Also avoid pressing too hard with brushes over sunscreen — gentle patting is life-saving.
I found letting my sunscreen set and then lightly blotting with a tissue before primer helps a lot.
Short answer: yes, always wear SPF. To avoid pilling, use a lightweight, non-greasy sunscreen and allow it to fully absorb (2–3 minutes) before primer. Press products into the skin rather than rubbing. If a sunscreen pills on you, try a chemical sunscreen instead of a thick mineral one.
Or try mixing a few drops of sunscreen with your foundation (if it’s compatible) — fewer layers, less pilling.
Loved the technical bits about product pairing. Quick question from the mature-skin corner: any specific tweaks for fine lines? Creams are great but sometimes they settle.
Also, what’s the recommended way to highlight if you have texture or shallow tear troughs?
For mature skin: keep coverage light and hydrating, avoid heavy powders in lines, and use finely-milled or sheer cream highlighters. Place highlight slightly above the high points instead of directly in lines to avoid settling. For under-eye texture, use a luminous concealer sparingly and set only where needed.
Also, a micro-layering technique (tiny thin layers) beats slapping on one thick product — less settling.
I find using a soft-focus primer helps fill in tiny lines and keeps cream products from settling.
OMG this is the dewy post I didn’t know I needed 😍
I tried the cream bronzer trick (step 4) and my complexion looked so warmed and healthy — no cakey powder lines! A few notes:
– I mix a tiny bit of liquid highlighter into my foundation for extra radiance
– Don’t overdo the cream bronzer on pale skin tho, start small
Would love a mini list of drugstore picks next time!!
If you want cheap recs rn: NYX Born to Glow primer is 💯 and e.l.f. has a few budget cream bronzers that blend like butter.
Haha same, my wallet says yes.
Seconding NYX — I use it under everything. Cheap but works.
Would love that drugstore list too — saving this comment for when I go shopping lol.
Yay Priya — mixing liquid highlighter with foundation is a pro move, especially for a subtle all-over glow. I’ll put together a drugstore roundup soon — thanks for the suggestion!
I’m always nervous about ‘strategic highlighting’ because I have a round face. Your diagram helped me visualize placement better than most videos. Thank you — I actually stopped highlighting my chin like a weirdo lol.
Loved the ‘creams over powders’ section — switched to cream blush + bronzer and I actually look alive in photos now.
My only gripe: it can be messy if you’re in a rush. Any quick-finish tips for on-the-go blending?
I keep a small beauty sponge in a compact case — quick damp swipe, blends almost instantly.
For on-the-go blending: use fingers for quick warmth and diffusion, a damp sponge for speedy buffing, or pack a small cream stick you can swipe and tap. Multipurpose products (lip/cheek stick) are lifesavers when you’re short on time.
If it’s humid, powders will set things faster — but then you risk losing dew. Balance is key!
I just use my thumb, lol. Works 70% of the time, every time.
Pro tip: warm the cream on the back of your hand before applying — blends faster.
Some constructive thoughts:
1) The tips are great but could use more variance for different skin types (very dry vs very oily).
2) A short troubleshooting FAQ for common issues (too dewy/too matte/cakey) would be helpful.
3) Loved the ‘set smart’ section — setting spray vs powder trade-offs were explained well.
Would read an expanded version for sure.
Yes to a troubleshooting section!! Especially for the ‘too dewy’ panic at 3pm 😂
Thanks Kevin — those are excellent suggestions. I’ll expand the guide to include a troubleshooting FAQ and more detailed skin-type variations.
I’d add a small subsection for mature and acne-prone skin — their needs differ a lot.
Agree — more on skin types would be super useful. Thank you for the thoughtful feedback!
As a guy who only learned what ‘highlight’ meant last month: can I follow this whole guide without it being obvious I’m wearing makeup? I just want healthy skin, not disco ball vibes.
Absolutely — focus on sheer, buildable products and subtle placement. Use cream products sparingly and blend well. Stick to natural tones and avoid overly shimmery formulas. You’ll look like a healthier, more rested you — not a disco ball.