This step-by-step guide will show you how to effectively sort and arrange your cosmetics using a clear storage organizer. Say goodbye to cluttered makeup drawers and hello to an organized and visually appealing collection. With easy-to-follow instructions and helpful tips, you’ll be able to create a functional and beautiful storage system for all your beauty products. Plus, did you know that the average woman spends over $15,000 on cosmetics in her lifetime? It’s time to take control and make the most out of your investment with a clear storage organizer.
Popular Storage Solution for Cosmetics
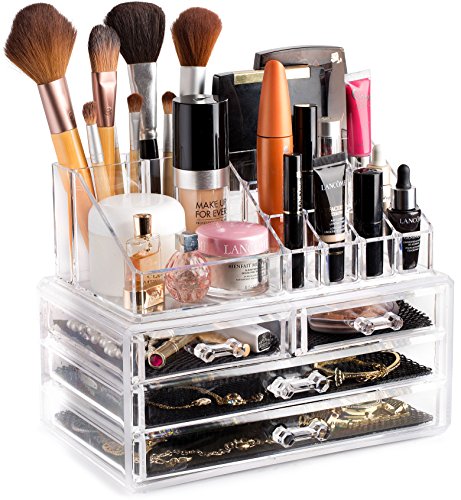


Amazon’s Tiered Beauty Organizer: The Ultimate Solution for Organization
Gather all your cosmetics
- Collect all your cosmetics from different areas: Begin by going through your entire house and gathering all of your cosmetics from various areas. This includes your bathroom, bedroom, purse, and any other place where you might have stored cosmetics. Be thorough and check every nook and cranny to ensure you collect everything.
- Bring them to one place: Once you have collected all your cosmetics, bring them to one central location. Choose a well-lit and spacious area, such as your vanity table or a clean countertop. Lay out a clean towel or a tray to keep your cosmetics organized and prevent them from rolling around. Arrange them neatly, grouping similar items together, like lipsticks, eyeshadows, or brushes.
Remember, the goal is to have all your cosmetics in one place to make it easier for you to find and use them. Taking the time to gather and organize them will save you precious minutes when getting ready and ensure that you have a clear view of what you own.
Sort your cosmetics by category
To categorize your cosmetics by type, start by gathering all your makeup products and organizing them into groups based on their function. Begin with foundation products, such as liquid or powder foundations, BB creams, and tinted moisturizers. Place them in one designated area, whether it’s a drawer, shelf, or storage container. This will help you easily locate and select the right product for your base makeup routine.
Next, move on to blushes and bronzers. Arrange them together, separating powder blushes from cream or liquid formulas if you have both. You can further subcategorize them by color if you have a large collection. For example, group all your pink blushes together and your peach or coral blushes in another section. This will make it convenient to choose the shade that best complements your desired makeup look.
After blush, focus on eyeshadows. Sort them into categories like neutral shades, warm tones, cool tones, and bold colors. This way, when you’re looking to create a specific eye makeup look, you can quickly locate the appropriate eyeshadow palette or singles. Additionally, you can organize them by finish, such as matte, shimmer, or metallic, to further streamline your selection process.
Lastly, categorize your lip products. Arrange lipsticks, lip glosses, and lip stains together. You can further organize them by color families, such as reds, pinks, nudes, and bold shades. This will allow you to easily find the perfect lip color to complement your overall makeup look.
Remember, the key to effective categorization is to find a system that works for you and your makeup collection. Experiment with different approaches and adjust as needed until you have a setup that helps you quickly find your desired cosmetics.
Discard expired or unused items
- Start by gathering all your cosmetics in one place, such as your bathroom counter or vanity.
- Look for the expiration date on each product. This information is usually indicated by a small symbol of an open jar with a number followed by the letter “M” (e.g., 12M means the product expires after 12 months).
- Check the dates on your cosmetics and separate them into two groups: expired and non-expired.
- Expired: Any products that have passed their expiration date should be discarded immediately.
- Non-expired: Set aside the products that are still within their recommended shelf life.
- Dispose of the expired cosmetics properly. Empty the contents of liquid products into the sink or toilet, and then place the empty container in the appropriate recycling or waste bin. For solid products, such as powders or lipsticks, wrap them in tissue or paper before discarding them in the bin.
- Take note of any products that are approaching their expiration date. Make a mental or written note to use them up before they expire.
Get rid of any cosmetics that you no longer use or need.
- Go through your collection of cosmetics and evaluate each item. Consider whether you still use or need it.
- Unused products: If you have cosmetics that you have never used or have only used a few times, it may be time to let them go. These can be products you received as gifts or impulse purchases that didn’t work out for you.
- Duplicates: If you have multiple items of the same type (e.g., multiple mascaras or lipsticks in similar shades), consider keeping only one and donating or giving away the rest.
- Outdated preferences: Your makeup preferences may have changed over time. If you no longer use certain types of products or colors, it’s time to declutter them from your collection.
- Separate the cosmetics you no longer use or need into two categories: donate and discard.
- Donate: If the products are still in good condition and have not expired, consider donating them to friends, family, or local shelters or organizations that accept gently used cosmetics.
- Discard: If the products are expired, damaged, or in poor condition, they should be discarded. Follow the same disposal steps mentioned above for expired products.
By regularly checking the expiration dates of your cosmetics and eliminating any expired or unused items, you can ensure that your collection stays fresh, organized, and clutter-free.
Clean your clear storage organizer
To ensure that your storage organizer is ready for your cosmetics, take the time to clean it thoroughly. Start by emptying the organizer and removing any items or products that may be inside. Then, using a damp microfiber cloth, wipe the entire surface of the organizer, including the inside and outside. Make sure to remove any dust, dirt, or residue that may have accumulated. Pay special attention to the corners and edges of the organizer, as these areas tend to collect more debris. Once you have wiped down the entire organizer, use a dry cloth to remove any excess moisture and leave it to air dry completely before proceeding.
Once your storage organizer is dry, examine it closely to ensure there are no remaining residues or streaks. If you notice any stubborn stains or marks, you can use a mild soap or detergent mixed with water to gently scrub the affected area. Rinse thoroughly with clean water and dry again with a cloth. It is important to make sure your storage organizer is completely clean and free from any residue or dust before placing your cosmetics in it. This will help to maintain the cleanliness and organization of your cosmetics, ensuring they stay in optimal condition.
Arrange your cosmetics in the organizer
Place each category of cosmetics in separate compartments or sections of the organizer, making it easy to find and access them when needed. Start by sorting your cosmetics into different categories such as skincare, makeup, haircare, and nail care. Once you have categorized them, identify the compartments or sections in your organizer that will best accommodate each category.
First, place your skincare products in one compartment. This can include items such as cleansers, toners, moisturizers, serums, and masks. Arrange them in a way that makes sense to you, such as by product type or in the order of your skincare routine. This will ensure that you can easily locate the specific product you need when taking care of your skin.
Next, dedicate another compartment to your makeup products. Separate your foundations, concealers, powders, blushes, eyeshadows, eyeliners, mascaras, and lip products into their respective sections. You can further organize them by color or product type, depending on your preference. This will allow you to quickly find the makeup you want to use and assemble your desired look without any hassle.
In a separate section or compartment, store your haircare essentials such as shampoos, conditioners, hair masks, styling products, and tools. You can arrange them based on their purpose or the order in which you use them in your haircare routine. This will make it convenient to grab the right product for your hair needs, whether it’s for cleansing, hydrating, or styling.
Finally, allocate a compartment or section for your nail care items. This can include nail polishes, nail polish removers, files, clippers, and cuticle creams. Arrange them in a way that makes it easy to see the colors or variations you have available and access them effortlessly when you want to do your nails.
By placing each category of cosmetics in separate compartments or sections of the organizer, you will save time and frustration when searching for a specific product. This method of organization also helps to maintain the overall cleanliness and orderliness of your cosmetics, ensuring that they are always within reach and in their designated place.
Organize your cosmetics effectively
In conclusion, organizing and arranging your cosmetics using a clear storage organizer is a simple yet effective way to declutter and streamline your beauty routine. By following the steps outlined in this guide, you can easily sort your cosmetics and ensure they are easily accessible whenever you need them. Remember, a clear storage organizer not only keeps your makeup tidy, but also allows you to see all your products at a glance, saving you time and effort. Invest in a clear storage organizer today and enjoy a more organized and efficient beauty routine.
Necessary Supplies

Cosmetic Organization Hacks

Hey, I’m Ava Wilson—a skincare enthusiast and a certified esthetician. I’m dedicated to sharing my knowledge and empowering others to achieve healthy, glowing skin through simple, effective routines and natural remedies. Join me on this exciting skincare journey, and let’s unlock your skin’s potential for a confident, beautiful you.