The step-by-step guide “How to store makeup brushes in a brush holder?” provides instructions on organizing and keeping makeup brushes in good condition.
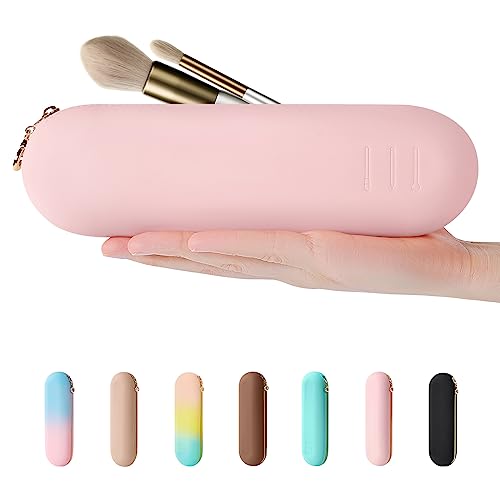
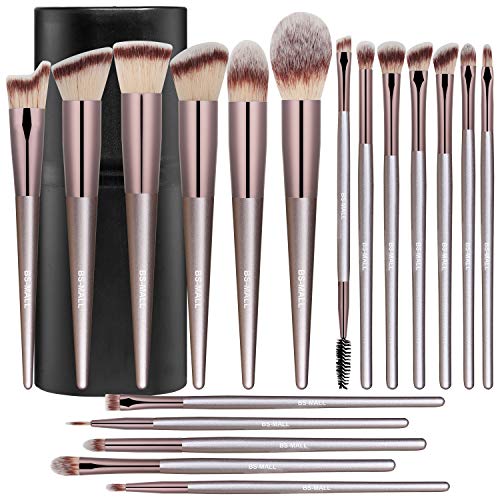
Top-Rated Makeup Brush Holder Organizers


Say Goodbye to Dust with Organized Brushes! 🧹✅ #SpringCleaning #Organizing
Gather the necessary materials
- Brush Holder: Begin by finding a suitable brush holder to store your makeup brushes. Look for a container that is tall enough to hold your brushes upright and has compartments or slots to separate and organize them. You can choose from various options such as a cup, a jar, or a brush roll. Make sure the holder is clean and free from any residue or dirt.
- Makeup Brushes: Gather your collection of makeup brushes. Ensure that you have all the brushes you need for your desired makeup look. Common types of brushes include foundation brushes, powder brushes, blush brushes, eyeshadow brushes, and blending brushes. Check each brush for any loose bristles or damage. If any brush is damaged, consider replacing it to ensure optimal application.
- Clean Surface: Find a clean and flat surface to work on. This can be a bathroom countertop, vanity table, or even a clean towel on a table. Make sure the surface is free from any debris, dust, or products that could contaminate your brushes. A clean surface will provide a hygienic workspace and prevent any unwanted transfer of bacteria or dirt onto your brushes.
Remember, keeping your brushes clean and storing them properly will help maintain their quality and prolong their lifespan. By following these steps, you will have all the necessary materials ready for your makeup application routine.
Clean the makeup brushes
- Gently Clean the Brushes:
- Use a gentle brush cleanser or mild soap to clean the brushes. These products are specifically designed to remove makeup residue and oils from the bristles without damaging them.
- Wet the brush bristles with lukewarm water, being careful not to wet the handle or the area where the bristles are attached.
- Apply a small amount of the brush cleanser or mild soap to your palm or a clean surface.
- Swirl the brush bristles in the cleanser or soap, making sure to coat them thoroughly. Use gentle circular motions to work the cleanser into the bristles, effectively removing any makeup buildup.
- Be careful not to press too hard or bend the bristles, as this can cause damage.
- Continue swirling the brush in the cleanser until the water runs clear, indicating that all the makeup residue has been removed.
- Rinse the brush bristles under lukewarm water, again being careful not to wet the handle or the attachment area.
- Thoroughly Rinse the Brushes:
- Hold the brush bristles facing downward under the running water, allowing the water to flow through the bristles. Gently squeeze the bristles with your fingers to ensure all the cleanser or soap is rinsed out.
- Keep rinsing until the water runs clear and there are no traces of cleanser or soap left on the bristles.
- Make sure to rinse the brushes one at a time to avoid any mixing of colors or products.
- Avoid submerging the brushes completely in water, as this can weaken the glue that holds the bristles together.
- Pat the bristles gently with a clean towel to remove excess water.
- Allow Brushes to Dry Completely:
- Lay the brushes flat on a clean towel or paper towel to dry. Ensure that the bristles are spread out and not touching each other to facilitate proper airflow and prevent the growth of bacteria.
- Avoid drying the brushes in an upright position, as water can seep into the handle and cause damage.
- Allow the brushes to air dry completely before using them again. This may take several hours or overnight.
- Once the brushes are dry, fluff the bristles gently with your fingers to restore their shape.
- Store the clean, dry brushes in a clean and dry container or brush holder to protect them from dust and bacteria until their next use.
Remember, cleaning your makeup brushes regularly not only ensures better makeup application but also promotes good hygiene by removing bacteria and preventing breakouts.
Prepare the brush holder
To prepare the brush holder, start by making sure it is clean and dry. Use a damp cloth to wipe away any dust or residue that may have accumulated on the surface. Gently scrub the brush holder to remove any stubborn dirt or stains. Once you have thoroughly cleaned the holder, allow it to air dry completely before using it. This step is crucial to ensure that your brushes remain hygienic and free from any contaminants. Remember, a clean brush holder will not only keep your brushes organized but also maintain their longevity and performance.
Organize the brushes by size
Separate the brushes by size to make it easier to find them later. Start by gathering all your brushes and laying them out in front of you. Take a moment to examine each brush and determine its purpose. Next, group the brushes into categories based on their size and function. For example, place all the larger face brushes together, followed by the smaller eye brushes, and then the tiny lip brushes. Use separate containers or dividers to keep each category organized. By organizing your brushes in this way, you will save time searching for the right brush when you need it, and ensure that each brush is easily accessible for its intended use.
Place the brushes in the holder
To place the brushes in the holder, follow these simple steps:
- Identify the designated slots or compartments: Take a look at the brush holder and locate the slots or compartments specifically designed to hold the brushes. These may vary depending on the holder’s design but are usually easily recognizable.
- Insert the brushes: Once you’ve identified the slots or compartments, gently insert each brush into its designated place. Make sure to align the brush handle with the slot and gradually push it in until the brush is securely held in place.
- Ensure upright positioning: As you insert each brush, ensure that it stands upright in the holder. This will help to prevent any damage or distortion to the bristles. Check that each brush is standing straight and not leaning against other brushes or objects in the holder.
- Avoid overcrowding: Ensure that the brushes are not overcrowded in the holder. Leave enough space between each brush to prevent them from rubbing against each other, which could potentially cause damage. If necessary, consider using a larger brush holder or organizing the brushes in a way that prevents overcrowding.
For example, if you have a brush holder with six slots, insert each brush into a separate slot, making sure they are spaced evenly. Avoid placing two brushes in the same slot or squeezing them tightly together.
By following these instructions, you can easily place your brushes in the holder, ensuring they are securely held, upright, and well-organized for easy access.
Secure the brushes
To ensure the longevity of your brushes, it is crucial to take proper care and protect them from dust and damage. If the brush holder you are using has a lid or cover, make sure to close it when not in use. This simple step will safeguard your brushes from accumulating dust particles which can affect their bristles and performance over time.
For instance, if you are using a brush holder with a lid like the XYZ brand, after finishing your painting session, firmly close the lid to create a tight seal. This will prevent dust from settling on the brushes and maintain their cleanliness.
However, if your brush holder does not come with a lid or cover, it is essential to find a secure spot away from potential hazards. Look for an area that is free from excessive dust, moisture, or direct sunlight. A shelf or a cabinet can be ideal places to store your brushes safely.
For example, if you have a brush holder without a lid, consider placing it inside a dedicated drawer in your art studio. Make sure to keep the drawer closed when not in use, protecting the brushes from dust, accidental spills, or any other potential damage.
By following these simple steps, you can ensure your brushes remain in excellent condition and ready for your next creative endeavor.
Maintain the brush holder
- Clean the brush holder regularly to prevent bacteria buildup.
- Use a mild soap or brush cleaner to clean the brush holder.
- Take out the brushes from the holder before cleaning.
- Gently scrub the brush holder with a soft brush or cloth.
- Rinse the brush holder thoroughly with clean water.
- Allow the brush holder to air dry completely before reinserting the brushes.
- Periodically check the brushes for any signs of damage or need for cleaning.
- Inspect the bristles for fraying, shedding, or discoloration.
- If the bristles are damaged, replace the brush with a new one.
- Clean the brushes with mild soap or brush cleaner if they appear dirty.
- Rinse the brushes thoroughly to remove any soap residue.
- Gently reshape the bristles and allow the brushes to air dry before using them again.
The Final Verdict
In conclusion, using a brush holder is a simple and efficient way to store your makeup brushes. Not only does it keep them organized and easily accessible, but it also helps to maintain their quality and extend their lifespan. By incorporating these tips into your beauty routine, you can ensure that your brushes are always ready for flawless application. So, say goodbye to cluttered makeup bags and hello to a well-organized brush holder!
Necessary Supplies
Organization Solutions
Step-by-Step Guide to Using the Makeup Brush Holder Organizer
- Place the makeup brush holder organizer on a flat surface, such as a vanity table or bathroom counter
- Insert the larger brushes, such as foundation or powder brushes, into the larger compartments of the organizer. This will help prevent them from getting crushed or damaged
- Use the smaller compartments for smaller brushes, such as eyeshadow or lip brushes. This will keep them separated and easily accessible
- You can also store other makeup tools, such as eyelash curlers or tweezers, in the compartments to keep everything organized in one place
- If the makeup brush holder organizer has a lid or cover, you can close it to keep the brushes clean and protected from dust or other particles

Hey, I’m Ava Wilson—a skincare enthusiast and a certified esthetician. I’m dedicated to sharing my knowledge and empowering others to achieve healthy, glowing skin through simple, effective routines and natural remedies. Join me on this exciting skincare journey, and let’s unlock your skin’s potential for a confident, beautiful you.