Why Instant Pore-Reduction Matters
Pores can look up to twice as large on camera and oil, texture, and shadow make them stand out in seconds. If you’re prepping for a selfie, meeting, or quick outing, fast makeup tricks are the quickest non-invasive way to smooth the look of skin. These methods don’t change your skin for good — they create a refined, photo-ready illusion fast.
This guide gives practical, step-by-step techniques you can use immediately: smart skin prep, the right primers and fillers, flawless foundation methods, setting and finishing tricks, targeted highlight and contour, and emergency touch-ups for all-day wear. Expect visual, temporary fixes that are simple, repeatable, and effective at minimizing pore visibility right now. You’ll see results immediately and feel more confident.


Make Your Pores Disappear with Makeup: Secret Techniques for Flawless Skin
Immediate Skin Prep: Quick Steps That Make a Big Difference
Remove surface oil fast
Start by taking oil off the surface — oil magnifies pores and makes texture show on camera. Swipe a blotting paper or gently press a clean tissue where your T‑zone gathers shine. For a quick cleanse between events, use a micellar water pad or an alcohol‑free cleansing wipe to avoid stripping skin.
Temporarily tighten and calm skin
Cold reduces puffiness and temporarily tightens pore openings. Splash cool water, hold a chilled compress or a wrapped ice cube for 10–20 seconds, or press a cold metal spoon along your cheekbones. This instant tightening makes pore filler and foundation sit smoother.
Lightweight hydration and mattifying balance
Use a featherweight hydrator so powder and primer don’t pill or cake:
Gentle, instant exfoliation alternatives
If you need to remove flaky texture, reach for single‑use options:
Common mistakes to avoid
Quick prep checklist
With skin prepped this way, primers and pore fillers will perform far better — next, we’ll walk through which primers work best and how to apply them for the smoothest finish.
Primers and Pore Fillers: Which Types Work Best and How to Apply Them
Primer textures and when to reach for them
Silicone-based pore-filling primers (think silky, blurring finishes) create a smooth film that physically fills and masks pores instantly. Water-based smoothing primers hydrate and even tone without the silicone feel—good if you prefer a breathable base. Blurring gel formulas sit between the two: cooling gels that slightly mattify while softening texture.
Popular, real-world picks: Benefit POREfessional and Smashbox Photo Finish (silicone-rich); e.l.f. Poreless Putty Primer (budget silicone option); Milk Hydro Grip (water-based, tacky finish for longer wear).
Ingredients to look for
Step-by-step application (quick and repeatable)
Layering and pairing rules
Quick troubleshooting
Next up: how to build foundation over these bases so pores stay minimized without caking.
Flawless Foundation Techniques to Avoid Accentuating Pores
Choose the right formula
Lightweight mattifying or buildable, medium-coverage foundations generally minimize texture best—think skin-like coverage rather than mask-like opacity. Examples that perform well in real-world use: Fenty Pro Filt’r Soft Matte (matte, blurred finish), Estée Lauder Double Wear (buildable, stays put), and MAC Studio Face and Body (sheer, skin-like). Look for “micro-finish,” “blur,” or “soft-focus” claims on labels rather than anything described as “glowy” or “dewy” for very textured zones.
Tools and application techniques that work
How to thin heavy foundations
If a foundation is too thick, dilute a pea-sized amount with:
Strategic product choices
Layering concealer without undoing primer blur
Setting and Finishing: Powders, Sprays, and Techniques That Blur Texture
Pick the right powder for the job
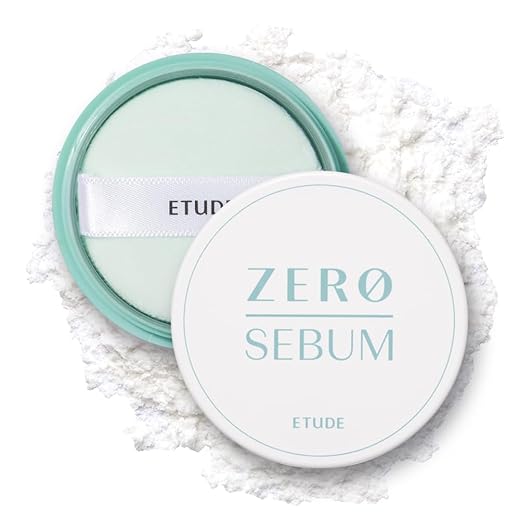
Finely-milled translucent powders (Laura Mercier Translucent, RCMA No-Color) give lightweight blur without adding pigment. Silica-based mattifiers absorb oil and create a soft-focus finish—great for shine-prone zones. Micro-finish powders (Hourglass Ambient or Charlotte Tilbury Airbrush-like formulas) add optical blurring without looking flat. For quick touchups on the run, a travel loose powder like the Etude Zero Sebum Loose Powder, 4g works well to control shine and refine texture.
Press, don’t sweep
The biggest trick: press powder into skin instead of sweeping. Use a small puff or damp beauty sponge and press in short, tapping motions—this packs product into the primer/foundation surface to fill and smooth pore edges. Sweeping with a big fluffy brush removes blur and distributes product unevenly, which can highlight texture.
Avoid cakeyness—practical how-tos
Finish with a light mist
A fine mist of setting spray (Urban Decay All Nighter–style) softens powder and “melts” everything together for a skinlike finish. Hold spray 8–10 inches away and use 1–2 short bursts—too much can reactivate product and move coverage.
Photo-safe & flash tips
Avoid heavy mineral or bright white powders before flash photography; silicone-containing or silica-based powders typically show less flashback. Quick test: take a smartphone flash selfie in natural lighting after setting to confirm no ghostly cast.
How much powder for your skin type
Strategic Highlighting and Contouring to Minimize Shadows Around Pores
How light and shadow change what we see
Pores read like tiny craters when light hits at an angle—highlights catch the rim, shadows deepen the pit. By controlling where light sits on the face you can trick the eye into smoother-looking skin. Think of your brush as a tiny theatre light: place it to flatter, not to spotlight texture.
Matte contouring to “flatten” textured zones
Use matte or satin bronzers and cool-toned contour creams to reduce perceived depth where pores cast shadows. The goal is subtle flattening, not sculpting for drama.
Practical placement tips:
Diffusing light with soft-focus products
Choose extremely finely milled blurring powders (think silica-forward finishes) or soft-focus cream products with a very low shimmer-to-reflect ratio. Apply sparingly—pat, don’t swipe—and blend edges well.
Product examples and techniques:
Small adjustments in highlight and contour placement can make pores disappear from the second you step out the door. Next, we’ll cover fast touchups and long-wear tricks to keep this effect all day.
On-the-Go Fixes and Long-Wear Tips to Keep Pores Invisible All Day
Your pocket-sized pore kit
Pack a tiny, smart kit for instant rescue after coffee, commute, or workouts:

Quick midday refresh (do this, not a foundation re-layer)
- Blot: press blotting paper onto oily zones—no dragging. This removes shine and excess oil that makes pores gape.
- Spot-prime: apply a pea-size dot of primer only to the largest pores; tap it in with a fingertip.
- Press powder: use the sponge to gently press a very thin layer of powder over the primed spots—avoid sweeping motions that build texture.
- Finish: a couple of short spritzes of setting spray (hold 12 inches away) to melt the powder into skin.
These steps shrink pores visually without piling product. I once fixed midday shine on a subway ride in under two minutes—blot, press powder, spritz—and no cakey buildup.
Long-wear strategies for different environments
End-of-day removal to protect pores
Double-cleanse: oil-based cleanser first to dissolve silicon and sunscreen, then gentle foaming or gel cleanser. Finish with a non-abrasive exfoliant 2–3× weekly to prevent congestion.
Next, we’ll wrap up the key habits that make pore-free fast finishes feel effortless.
Fast, Confident, Pore-Minimized Finishes
Instant pore reduction is achievable with smart prep, targeted primers, careful foundation methods, and thoughtful finishing touches. Subtle changes in product choice and application—hydration, smoothing primer, lightweight buildable foundation, and soft-focus setting—create natural, blurred skin without heavy makeup.
Experiment with the techniques here to discover what fits your skin and schedule. Small, consistent tweaks deliver long-lasting confidence; start simple, adjust as needed, and enjoy a smoother, camera-ready finish every day. Share your favorite quick trick below.

Hey, I’m Ava Wilson—a skincare enthusiast and a certified esthetician. I’m dedicated to sharing my knowledge and empowering others to achieve healthy, glowing skin through simple, effective routines and natural remedies. Join me on this exciting skincare journey, and let’s unlock your skin’s potential for a confident, beautiful you.


Okay, I have oily skin and tried everything. The Etude Zero Sebum powder mattifies well but I still get shine by lunchtime. Does anyone layer a lightweight primer and still get decent long wear without feeling tight? Asking for a friend (me).
If you’re into micellar spray, a mist after blotting can resettle makeup without adding oil. Just a tiny spritz.
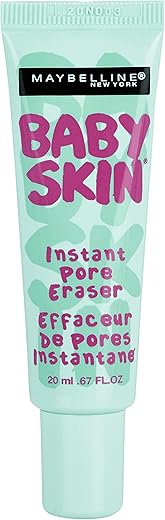
Try a mattifying primer + oil-blotting papers midday. Also switch to a satin-finish foundation rather than dewy — less oil shows through. Baby Skin primer + a thin layer of matte foundation did wonders for me.
Also try oil-control skincare at night (niacinamide, salicylic acid) — reduces midday oil over time so makeup stays better.
I layer a tiny bit of Etude in T-zone then use bamboo sheets midday. Workslll — but you have to reapply powder carefully.
For oily skin: mattifying primer, lightweight matte foundation, set only in oily zones with e.l.f. Translucent and carry blotting papers. Avoid heavy powder all over to prevent cakiness.
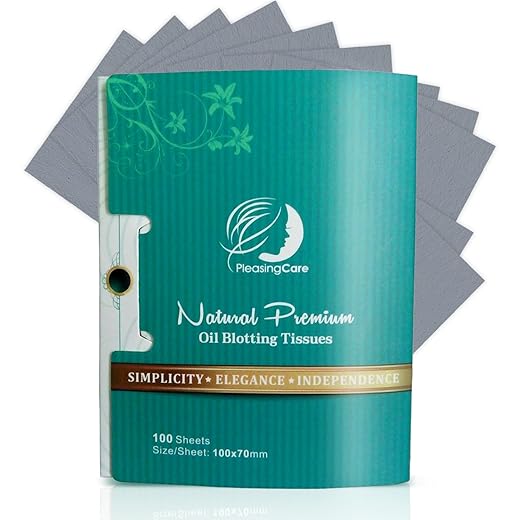
The bamboo charcoal blotting papers shout-out is clutch. I keep a pack in every bag. PS: they work better than those fancy compact powder puffs imo 🤷♀️
Not a huge makeup person, but these instant prep steps are doable even on rush days. The Baby Skin primer is cheap and does the job. The article could use a short checklist though — like a 1-minute, 3-minute, 5-minute routine breakdown. Would be super handy!
Great idea — a quick routine checklist would be useful. We’ll consider adding a one-minute, three-minute, and five-minute section in an update. Thanks!
Personal rant incoming: I used to bake the heck out of my under-eyes and then wondered why my pores looked like craters. You don’t have to slather powder everywhere. The ‘less is more’ advice in the setting section is legit. Also shoutout to bamboo charcoal sheets — cheap lifesavers.
Haha, guilty pleasures many of us had. Baking everywhere is a trap! Targeted setting is much kinder to texture.
Same! Took me forever to unlearn that. Now I only set T-zone and under-eyes lightly, more to melt everything together than to bake.
Good article but felt a tad basic in the foundation section. I wish there were more tips for textured skin (like those shallow scars) — not just enlarged pores. Also, trying Etude Zero Sebum loose powder made my skin look a bit cakey under bright lights. Any recs for a more natural finish?
Lighting makes a huge difference too. Studio lights will always expose texture — harsher powder application will exaggerate that.
Agree — less is more. I use less product and instead focus on spot-concealing and blurring with a finely-milled powder.
I had the same issue with Etude — I switched to the Maybelline Fit Me matte powder pressed for touch-ups and it reads more natural in photos.
Thanks for the feedback — noted. For textured skin, sheering out foundation with a damp sponge and focusing product on the flatter areas helps. Try e.l.f. Perfect Finish HD translucent powder very sparingly — apply with a fluffy brush and press lightly rather than buffing.
You can also mix a drop of facial oil into the foundation for shallow scars — makes texture less obvious. But be careful if you’re oily.
I’ve been experimenting with layering a pore-filling silicone primer then a light mattifying powder. Works well but sometimes pilling happens if you use too much. Tip: warm the primer between fingers and press it in instead of rubbing — less movement, less pill.
Experimentation is key. Different combos work for different skin chemistries. Keep notes and you’ll find the sweet spot.
I’ve found that applying primer only where needed (nose/cheeks) avoids pilling and still gives the blurring effect. Saves product too.
Also consider a spray setting mist after primer dries. I know it sounds weird but it can smooth the surface before foundation.
If pilling persists, try changing your moisturizer — sometimes silicones in skincare clash with silicone primers and cause issues.
Yesss pressing > rubbing. Also use less product on each layer; multiple thin layers beat one thick layer every time.
Great technical tip — warming the primer and pressing is a nice hack to prevent product displacement and pilling.
Short and sweet: if you’re in a hurry, baby skin primer + a light layer of Fit Me pressed and finish with a mist. You’re good for most of the day. Not perfect for flash photography but honestly 95% of the time I’ll take it over heavy makeup. ✌️
Agree! For nights out I’d add a small touch of e.l.f. translucent in the flash-prone spots, but your daytime combo is perfect.
Exactly — quick routines are all about compromise. That combo is a great everyday go-to.
I tried the contour/highlight trick to hide pore shadows like the article suggested — small win! Doing a very subtle matte contour around the nose and cheeks helped reduce the shadowing that makes pores look deeper.
Yes — strategic matte contouring minimizes shadows. Keep the contour soft and blended; sharp edges draw attention, which is the opposite of the goal.
This. I used to highlight right on top of texture and it made everything worse. Now I only highlight on the high points (cheekbones) and keep nose/cheek area matte-ish.
Lol the ‘pore-minimized finishes’ headline made me laugh — like a skincare wizard waved a wand. But honestly, the combo of primer + correct foundation + light powder does feel like a small miracle on camera.
Magic? Maybe. Technique and product choice are the wand and spell. 😄 Glad it resonated!
Quick tip that worked for me: after primer, tap a small amount of foundation with a damp sponge just in the pores-heavy areas, then set with e.l.f. translucent powder. Keeps things from settling into pores. Also — anyone else mix blotting papers and powder for midday touch-ups? 😅
That’s a solid method. Blot first to remove oil, then press powder lightly to avoid over-drying. Combining products can be the best way to extend wear without caking.
Also, try a setting spray after the powder to melt everything together — makes it look less powdery.
Yep I do blotting paper first then a tiny bit of pressed powder. The Bamboo Charcoal ones are my fave for midday rescue.
I try not to layer powder too often — it can cake. But if you really need to, use a very small fluffy brush and tap off excess before pressing.
Random observation: Maybelline Fit Me Matte Poreless is legit for touch-ups, but it can look powdery if you go overboard. A light hand or a damp sponge to press it in makes a nicer finish.
Good point — pressure and application method matter a lot with pressed powders. Thanks for chiming in.
100% agree. Also use a kabuki or small dense brush for controlled placement instead of large powder brushes.
Love the instant primer tip — I’ve been using Maybelline Baby Skin for months and it actually helps a lot when I’m in a rush. Quick question: do you apply it before or after moisturizing if I’m using a lightweight gel moisturizer?
Apply your gel moisturizer first, give it a minute to sink in, then use the Baby Skin primer. The primer needs a slightly tacky-but-not-wet base to grip makeup and fill pores.
If you’re in a rush, just moisturize, blot with a tissue, then primer. Saves time and avoids pilling.
Agree with admin — I pat my moisturizer in, wait 30–60 seconds, then primer. Works even on oily-combo skin!
Super helpful read. One tiny critique: would love a quick pros/cons list for the listed products (Baby Skin primer, Etude powder, e.l.f. powder, Maybelline Fit Me pressed) — saves me trial-and-error time. Otherwise great tips.
Great suggestion — a pros/cons table for those products is an easy add. We’ll include brief notes in the next edit.
I’ll start: Baby Skin = cheap + blurring, can pill on heavy creams. Etude = super mattifying but can be drying. e.l.f. Translucent = good for photos. Fit Me pressed = great for touch-ups and portability.